Webhooks Integration
Automate event workflows with webhooks using Zapier. Connect Gatsby to Hubspot, Airtable, Attio, and thousands of apps for streamlined operations.
Connect Gatsby to thousands of apps through webhooks using Zapier, Make, or n8n. This integration lets you automatically sync guest data, event updates, and more to systems like Hubspot, Airtable, and your CRM.
Don’t see webhooks in your account? Contact us to enable.
Available Webhooks
Section titled “Available Webhooks”Event Created or Deleted
Fires when you create a new event or cancel an existing one. Use this to update project management tools or notify your team.
Guest Created or Edited
Fires when someone new joins your guest list or when existing guests change their RSVP status. This is the most commonly used webhook for CRM integrations.
Sync Entire Guest List
Manually triggered from within Gatsby when you want to push all guest data at once. Helpful for initial setup or bulk updates.
Using Zapier
Section titled “Using Zapier”While this guide is focused on using Zapier, other platforms like Make.com or n8n will work in a similar way.
Requirements
Section titled “Requirements”You need Zapier Pro to use webhooks. The free Zapier plan does not include webhook functionality.
Setup Instructions
Section titled “Setup Instructions”-
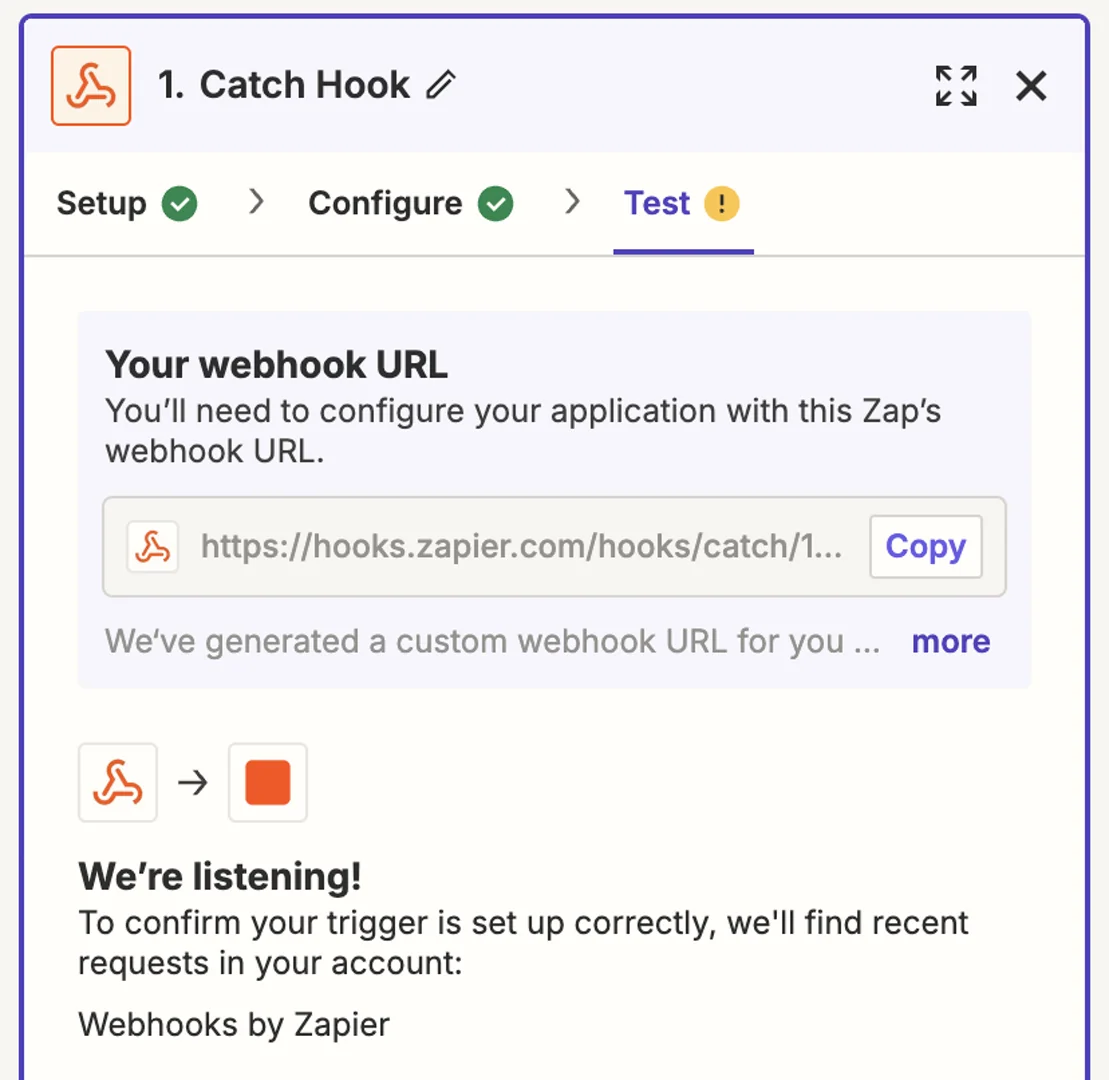
Create Your Zap
In Zapier, create a new Zap and choose “Webhooks by Zapier” as your trigger app. Select “Catch Hook” as the trigger event.
-
Copy the Webhook URL
Zapier will generate a unique webhook URL. Copy this URL - you’ll paste it into Gatsby in the next step.
-
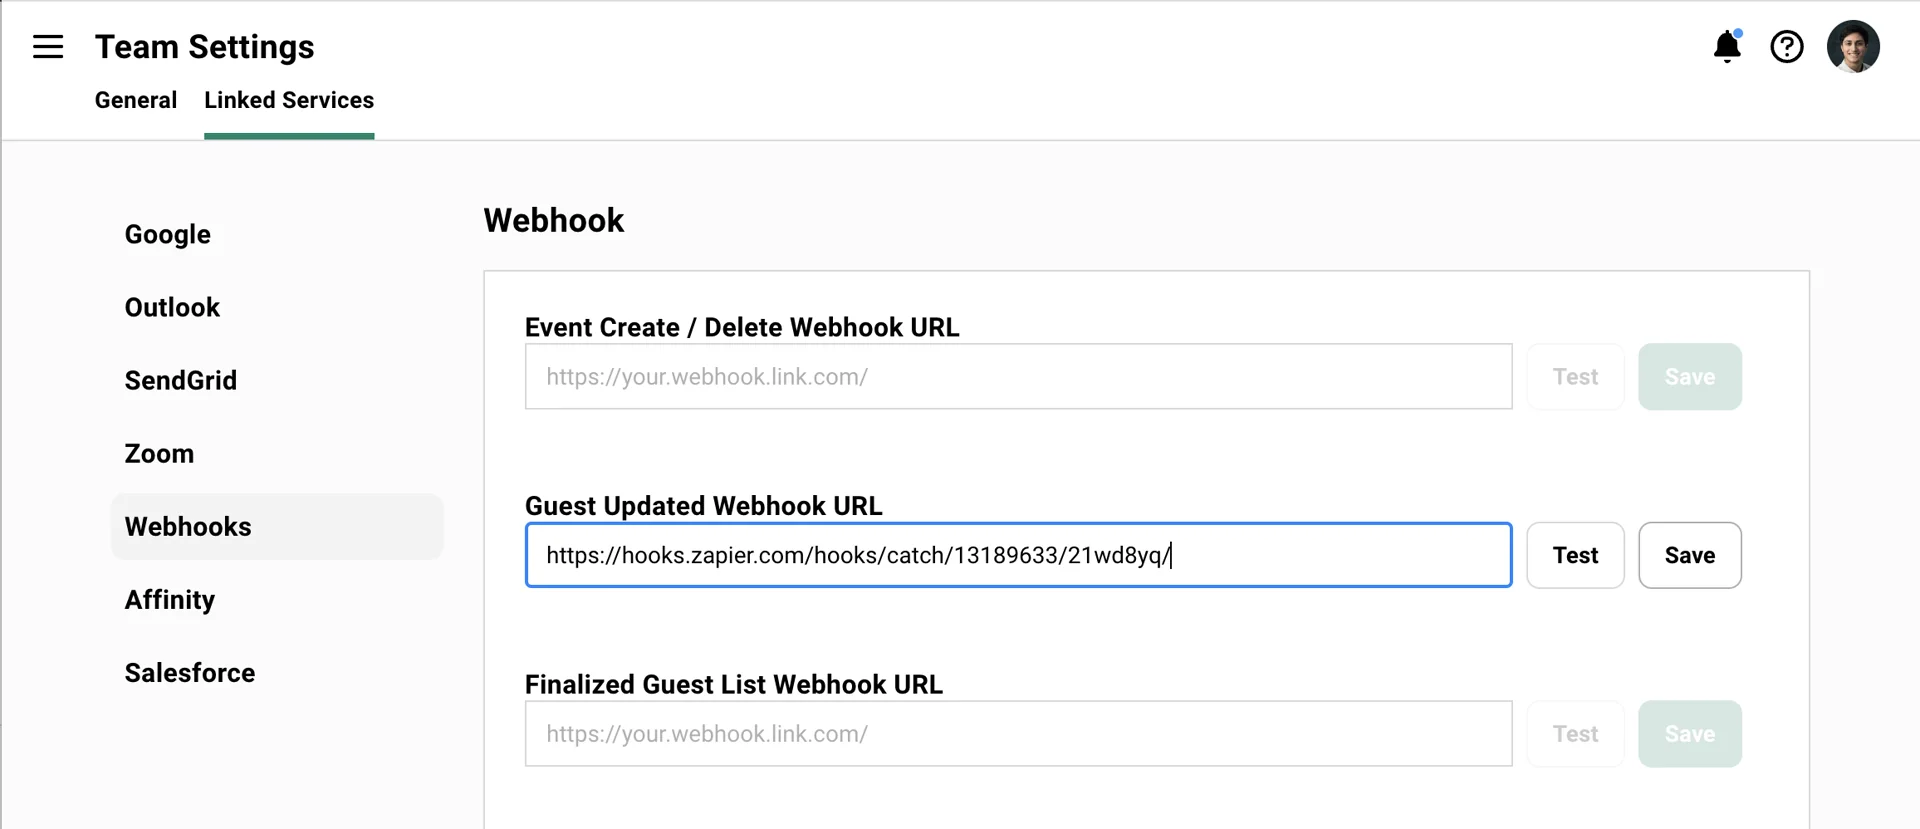
Configure Gatsby Webhooks
In Gatsby, go to Settings > Integrations > Webhooks. Paste your webhook URL into the appropriate field. For most use cases, you’ll want “Guest Updated Webhook URL” since it captures RSVP changes and new registrations.
-
Test the Connection
Click “Save” then “Test” in Gatsby. You should see “Webhook reachable” if the connection works. In Zapier, click “Test trigger” to confirm it received the test data.
-
Generate Real Data
Add a guest to any event or update an existing RSVP to send real data through the webhook. This gives you actual field names to work with in your Zap.
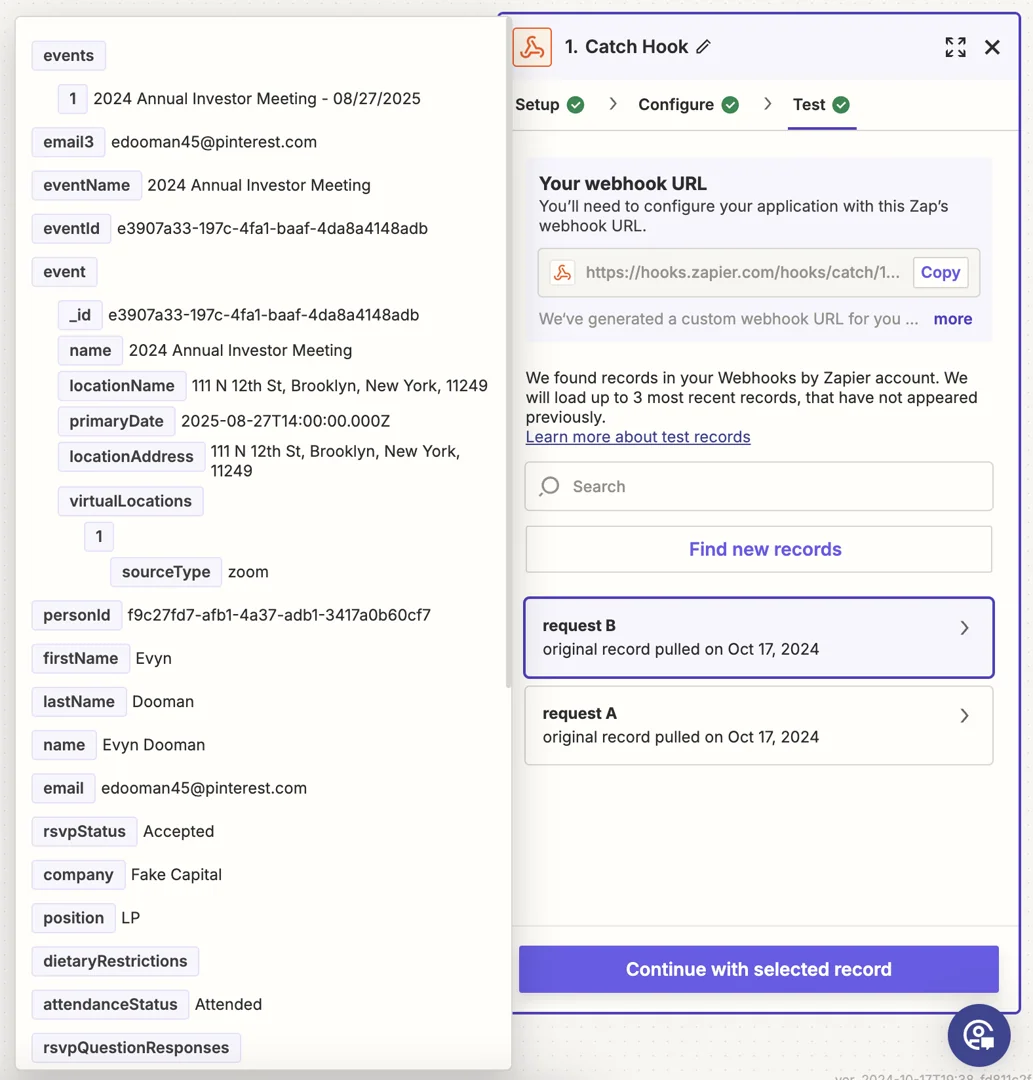
Your webhook is now ready to receive data from Gatsby. The next step is connecting it to your destination app.
Airtable Example
Section titled “Airtable Example”This example shows how to create or update Airtable records based on Gatsby guest activity.
-
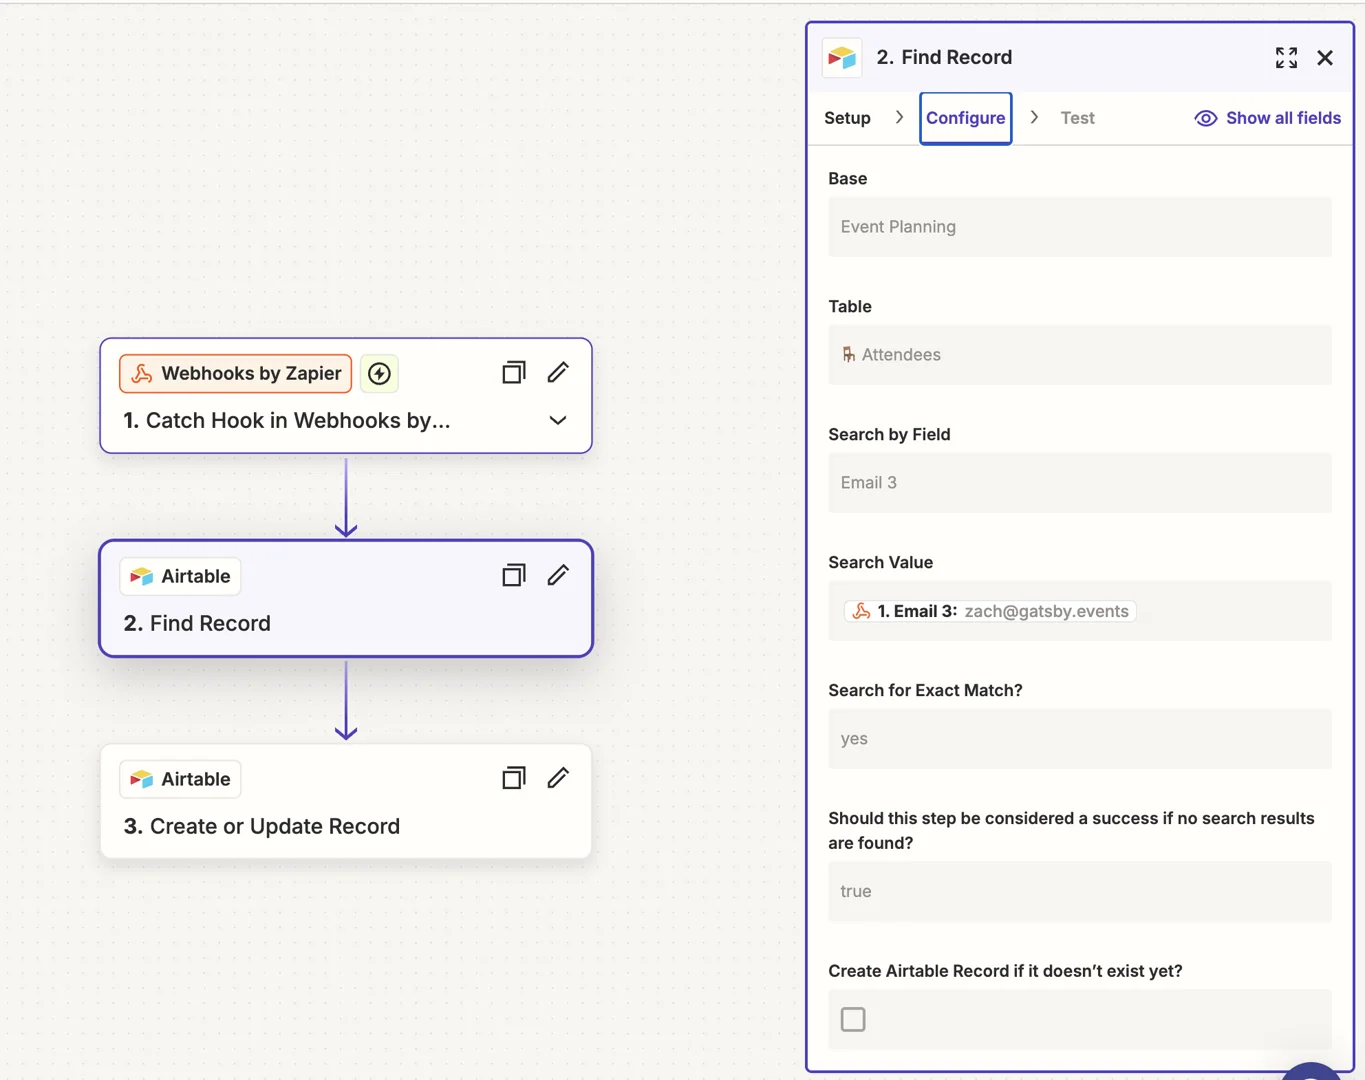
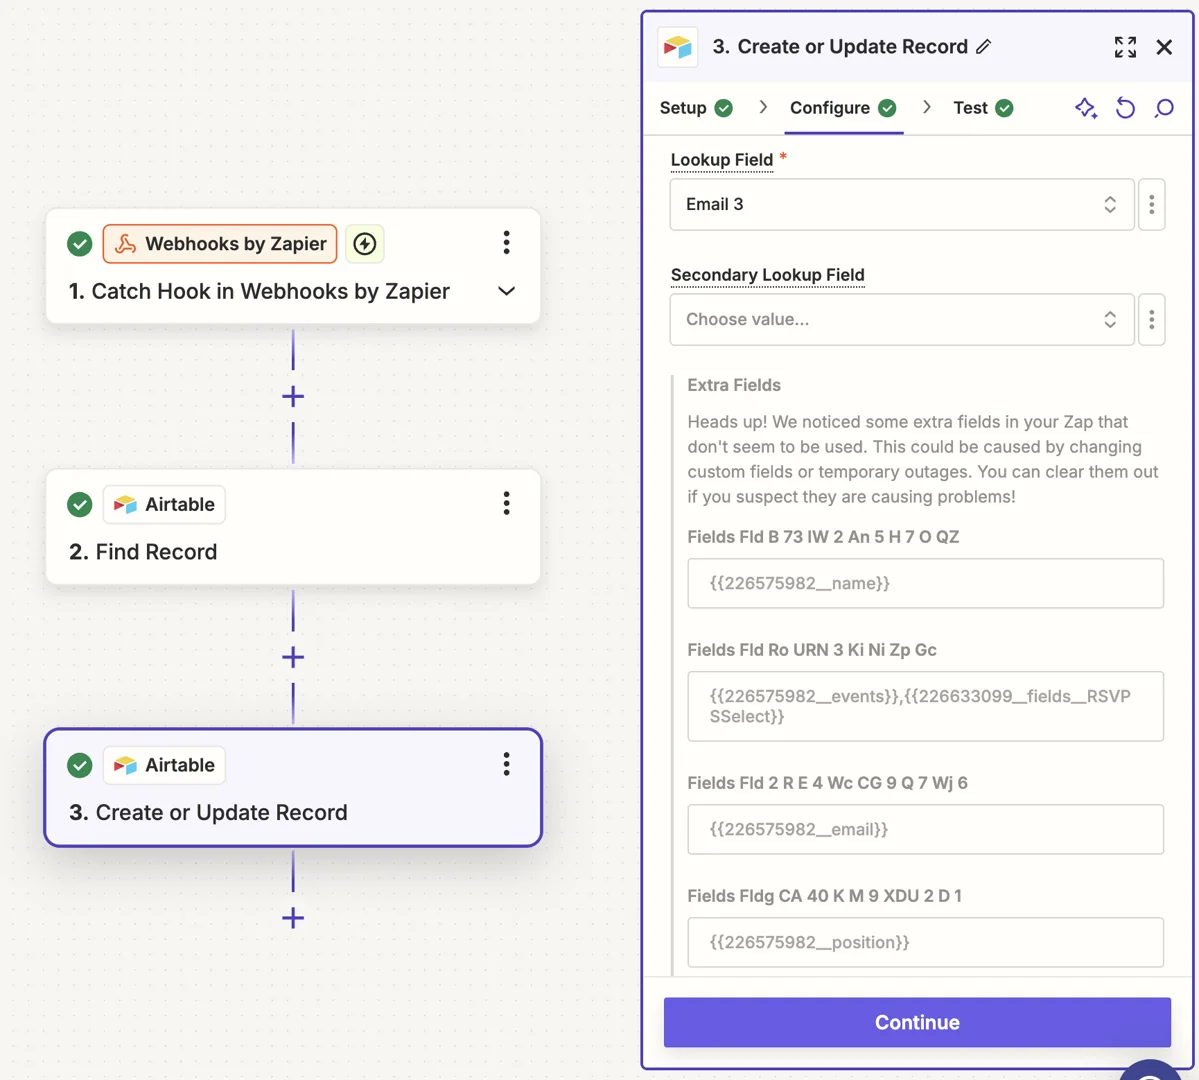
Add Find Record Step
Add an Airtable “Find Record” action to your Zap. Set the search field to “Email 3” - this is the field Gatsby uses for guest email addresses.
-
Configure the Lookup
This step attempts to find existing records in Airtable before creating duplicates. If no match is found, the next step will create a new record.
-
Add Create or Update Step
Add an Airtable “Create or Update Record” action. Use “Email 3” as your lookup field and map other Gatsby fields to your Airtable columns as needed.
Your Zap will now automatically create new Airtable records for new guests and update existing records when guests change their RSVP status.
Hubspot Example
Section titled “Hubspot Example”Connect Gatsby to Hubspot to automatically sync event registrations with your CRM contacts.
-
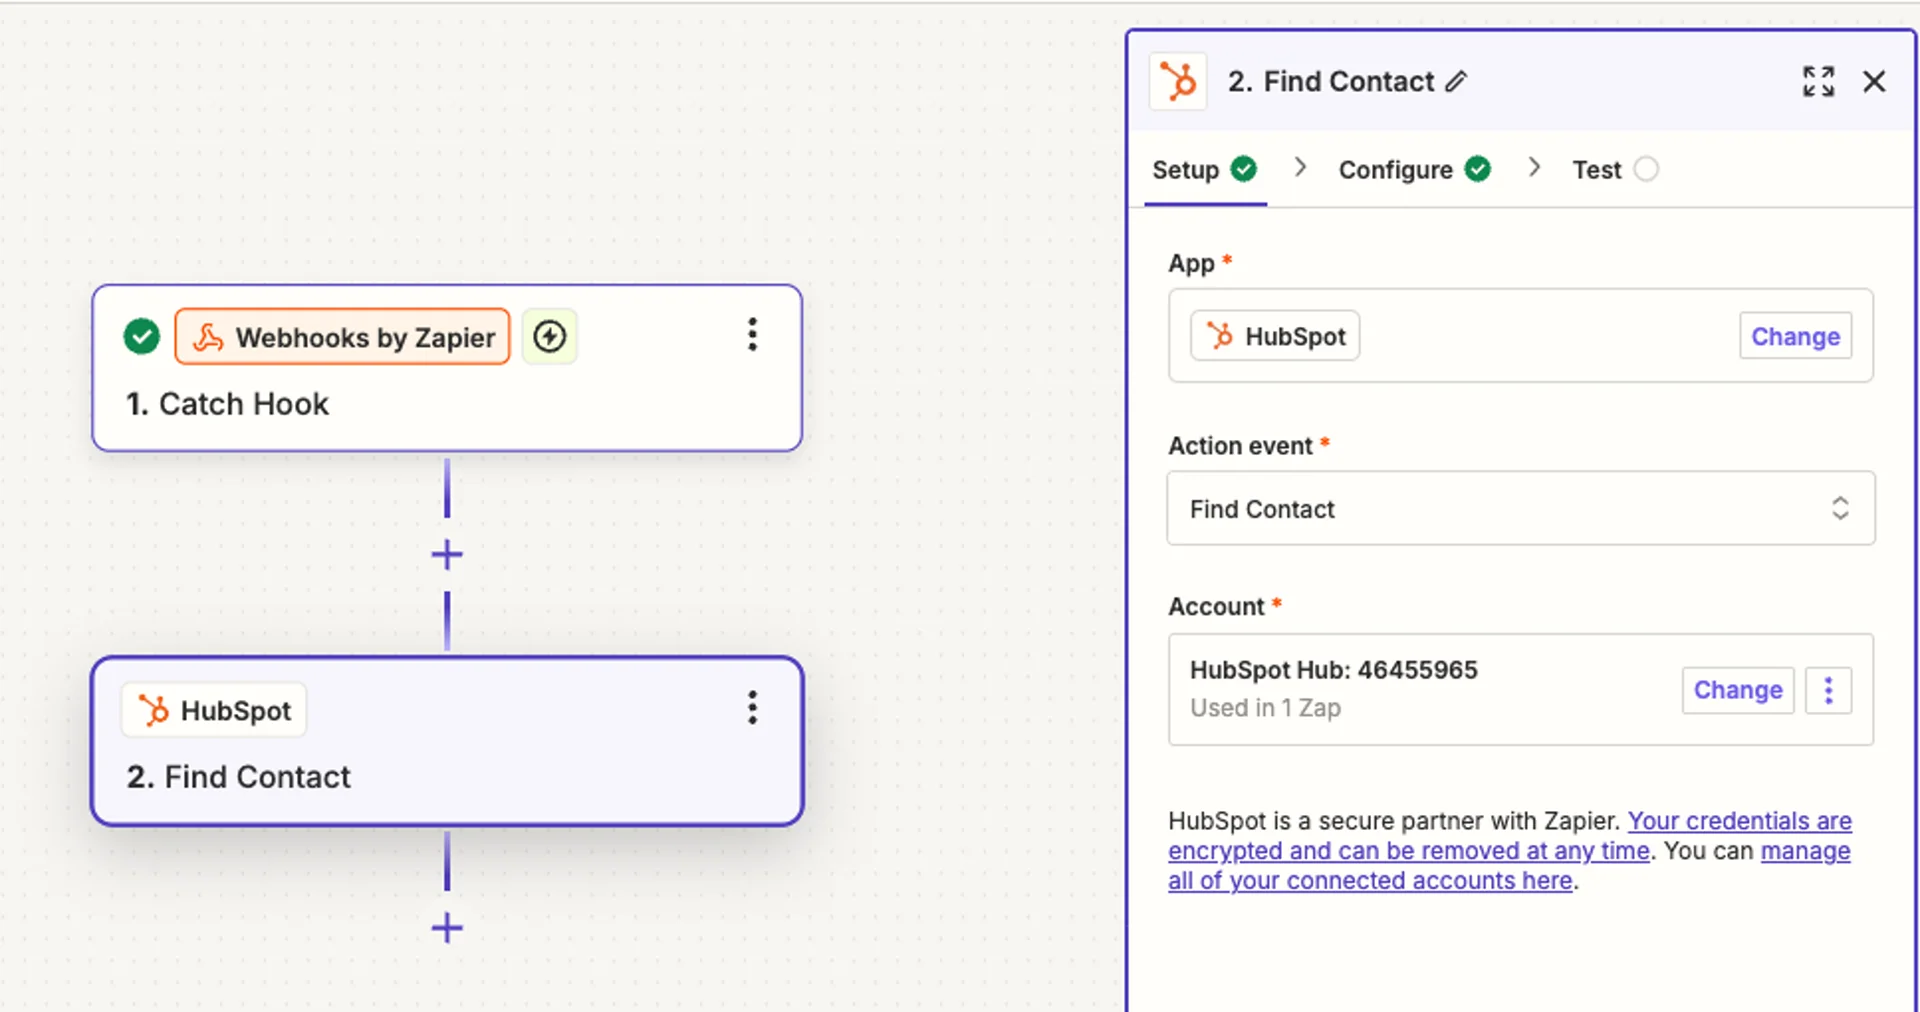
Connect Hubspot
Add a Hubspot “Create or Update Contact” action to your Zap. Connect your Hubspot account when prompted.
-
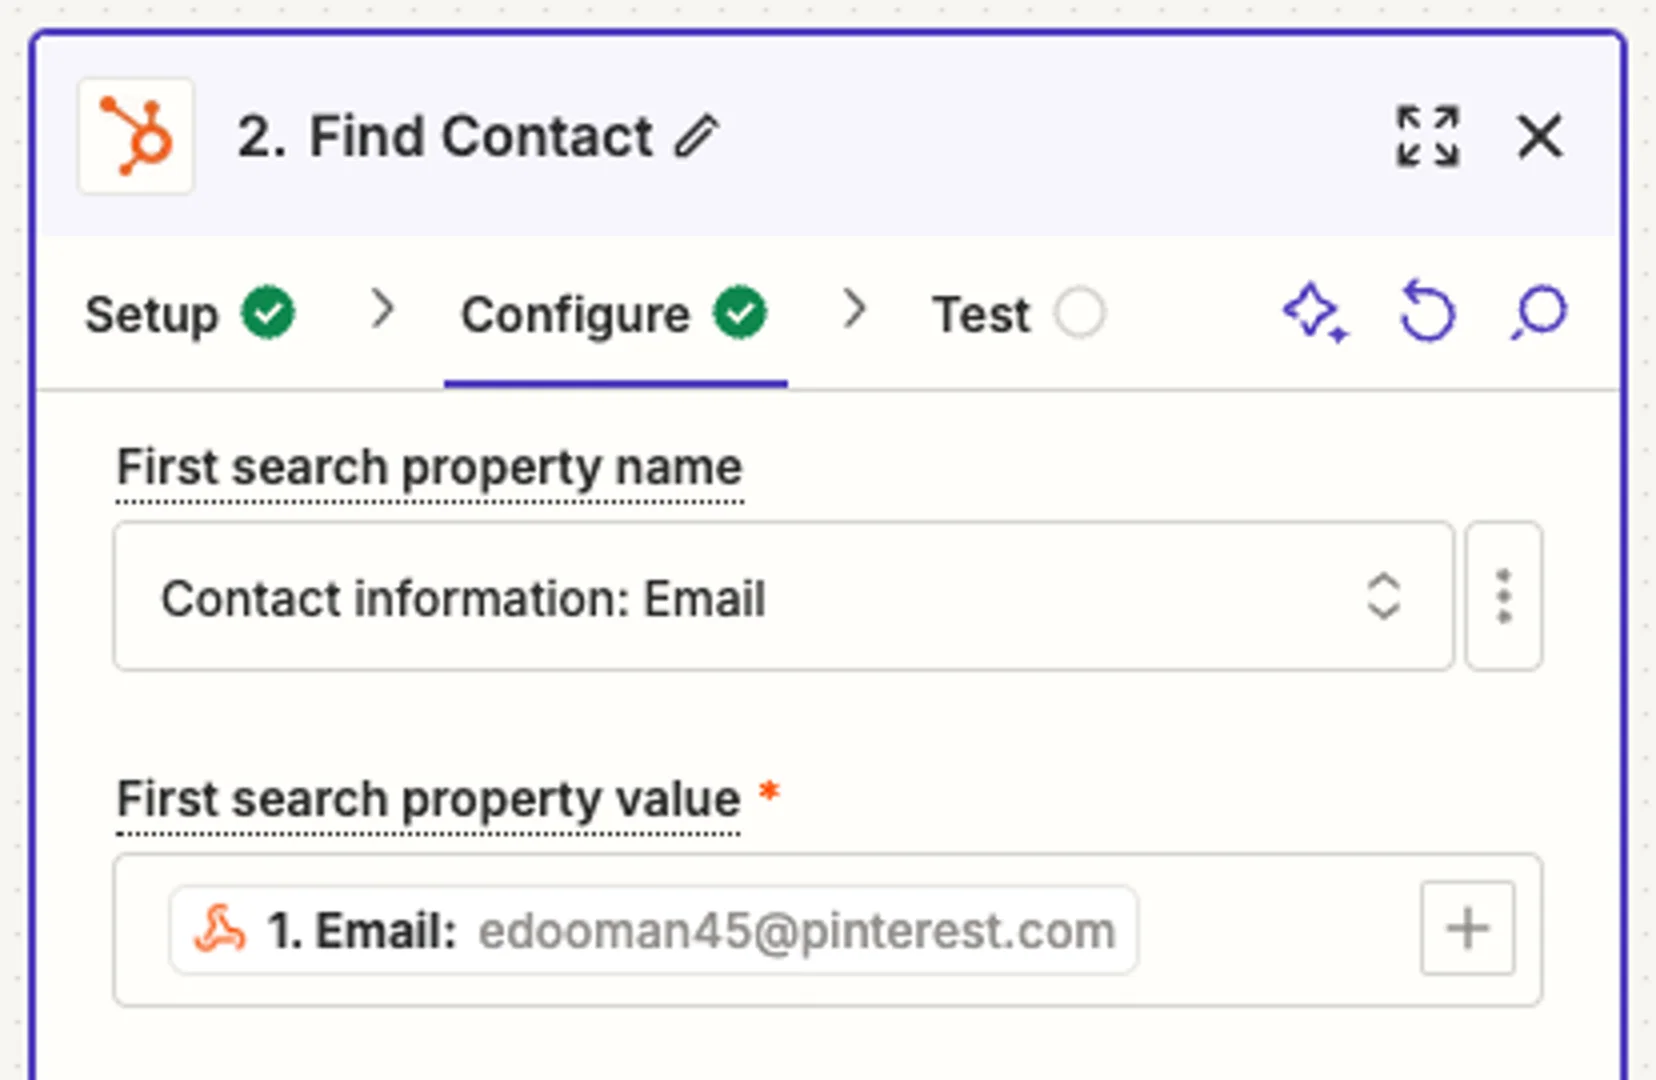
Set Email as Matching Field
Configure the action to match contacts by email address. This prevents duplicate contacts when guests update their information.
-
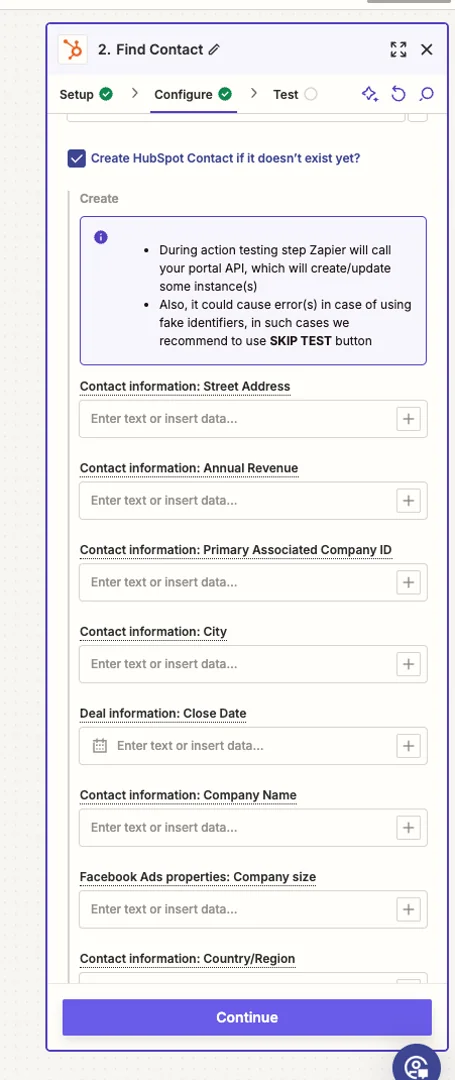
Map Your Fields
Enable “Create Hubspot Contact if it doesn’t exist yet” to automatically create contacts for new guests. Map Gatsby fields like company information and custom fields to the corresponding Hubspot properties.

Your CRM will now stay in sync with your event registrations automatically.
Troubleshooting
Section titled “Troubleshooting” Webhook shows as unreachable
Check that you copied the complete webhook URL from Zapier, including the https:// prefix.
No data appearing in Zapier
Make sure you’ve triggered the webhook by adding or editing a guest after setting up the connection.
Duplicate records being created
Verify that your destination app is using email as the matching field and that you search for existing records and either update or create as needed.
Add to your calendar
Add to your calendar