Event Check-In
Streamline event check-in with Gatsby. Track arrivals, register walk-ins, and print badges on-demand for professional first impressions at your event.
Gatsby provides multiple ways to track guest arrivals and manage last-minute changes. You can check guests in from your computer or use the mobile app.
Check In via App
Section titled “Check In via App”-
Download and Login
Download the Gatsby organizer app from the Apple App Store. Login with Gmail or your username and password.
-
Select Event
Find your event, and tap to select.
-
Start Check-In
Tap “Go to Check In” to access the guest list.
-
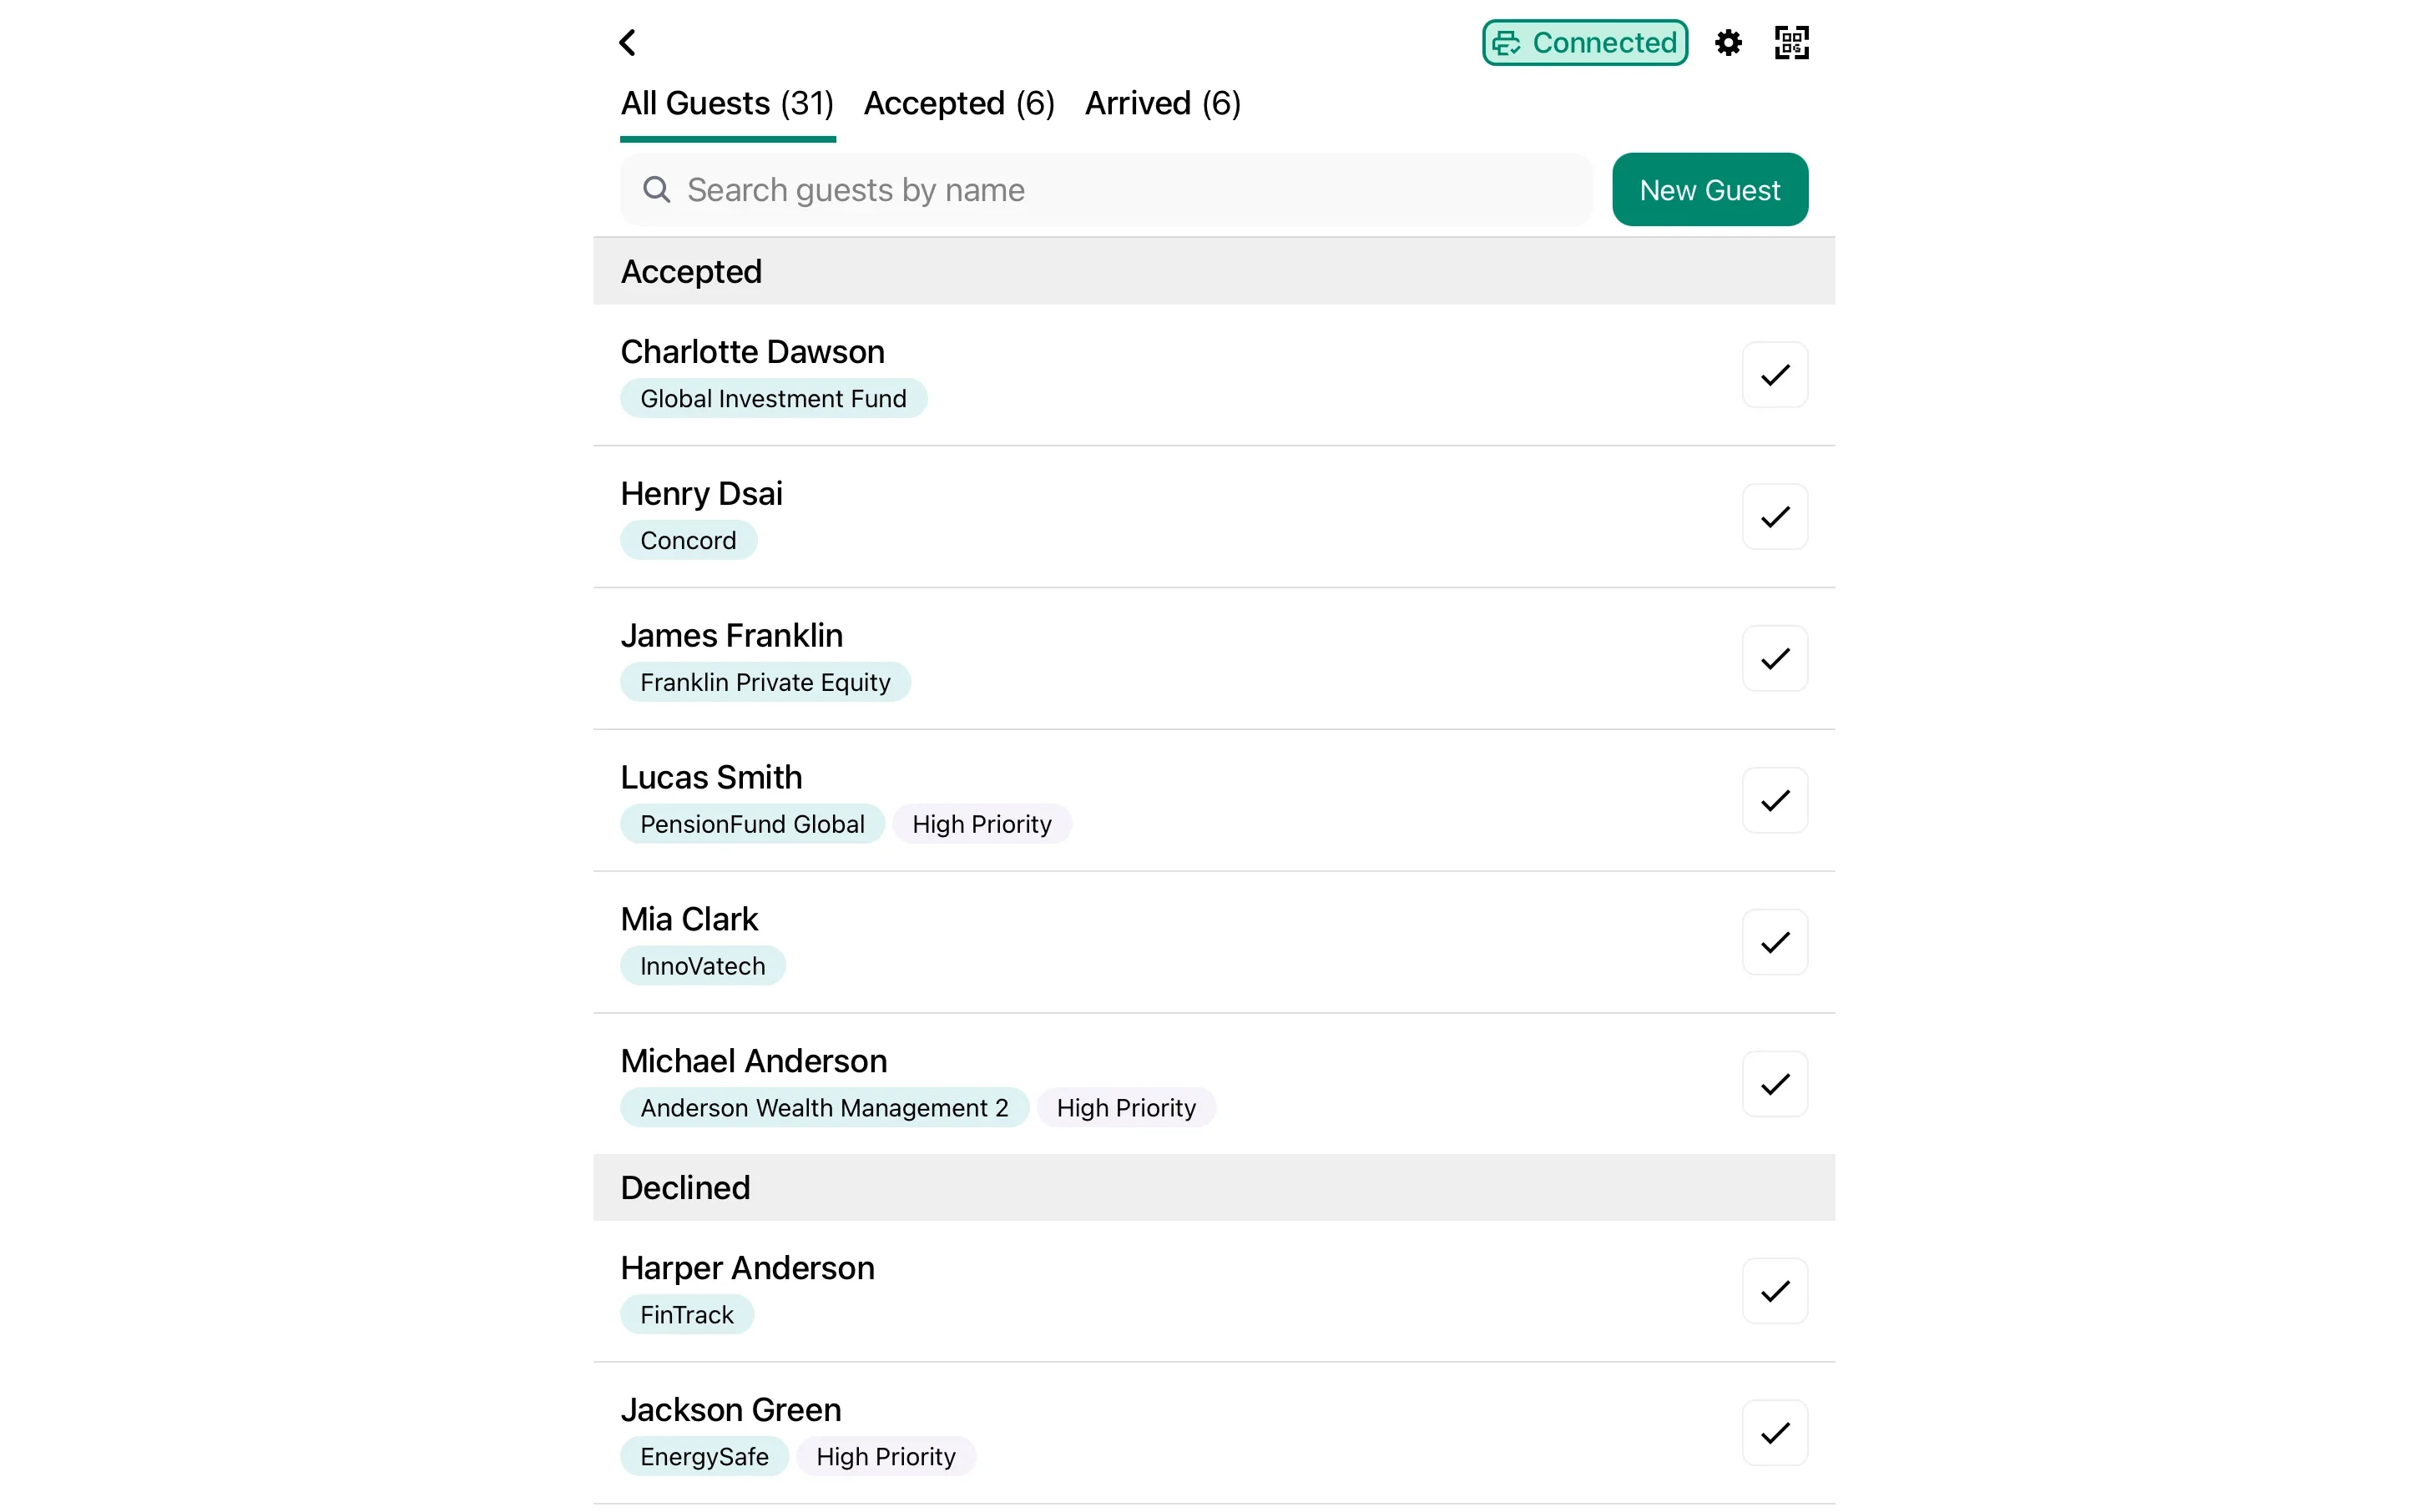
Check In Guests
Search for contacts or scroll through the guest list to find and check in guests. You can also scan a QR code to check in guests (QR codes must be sent to guests ahead of time).
Tap the check mark next to their name, confirm by tapping “Check In”.
Show more info
Show guest information like attendee type, VIP status, and seating chart info by tapping the “gear” icon in the top right.
-
Confirm
Confirm you’re checking in the right guest.
If you have a connected badge printer, the option to print their badge will appear next. The dialog will close when the badge is done printing.
Guest Not Found, Add Walk-Ins
Tap the “New Guest” button in the top right corner to add walk-in guests. You’ll need to collect their name and info.
If your walk-in is arriving with an invited guest, you can quickly add their plus one by checking in the primary guest, and using the “Add +1” option.
Alternatively, if your event has the “public link” turned on, you can display a QR code for a guest to scan to visit your RSVP landing page and fill out all required information.
View Arrivals / Undo
Switch to the “Arrived” tab to see who has already been checked in. Tap a guest to select their profile and undo check-in.
Use Kiosk Mode for Self-Service Check-In
Section titled “Use Kiosk Mode for Self-Service Check-In”Kiosk mode is currently in beta testing.
Kiosk mode lets guests check themselves in. Set up an iPad at your entrance and guests type their own name (or scan their QR code), answer registration questions, and print their badge without staff intervention.
Configure kiosk behavior globally
In the app, go to Settings » Kiosk Settings to control what fields guests can edit, enable walk-in registration, adjust search sensitivity, and set auto-return timing after badge printing.
-
Select Your Event
Open the Gatsby organizer app and tap your event to select it.
-
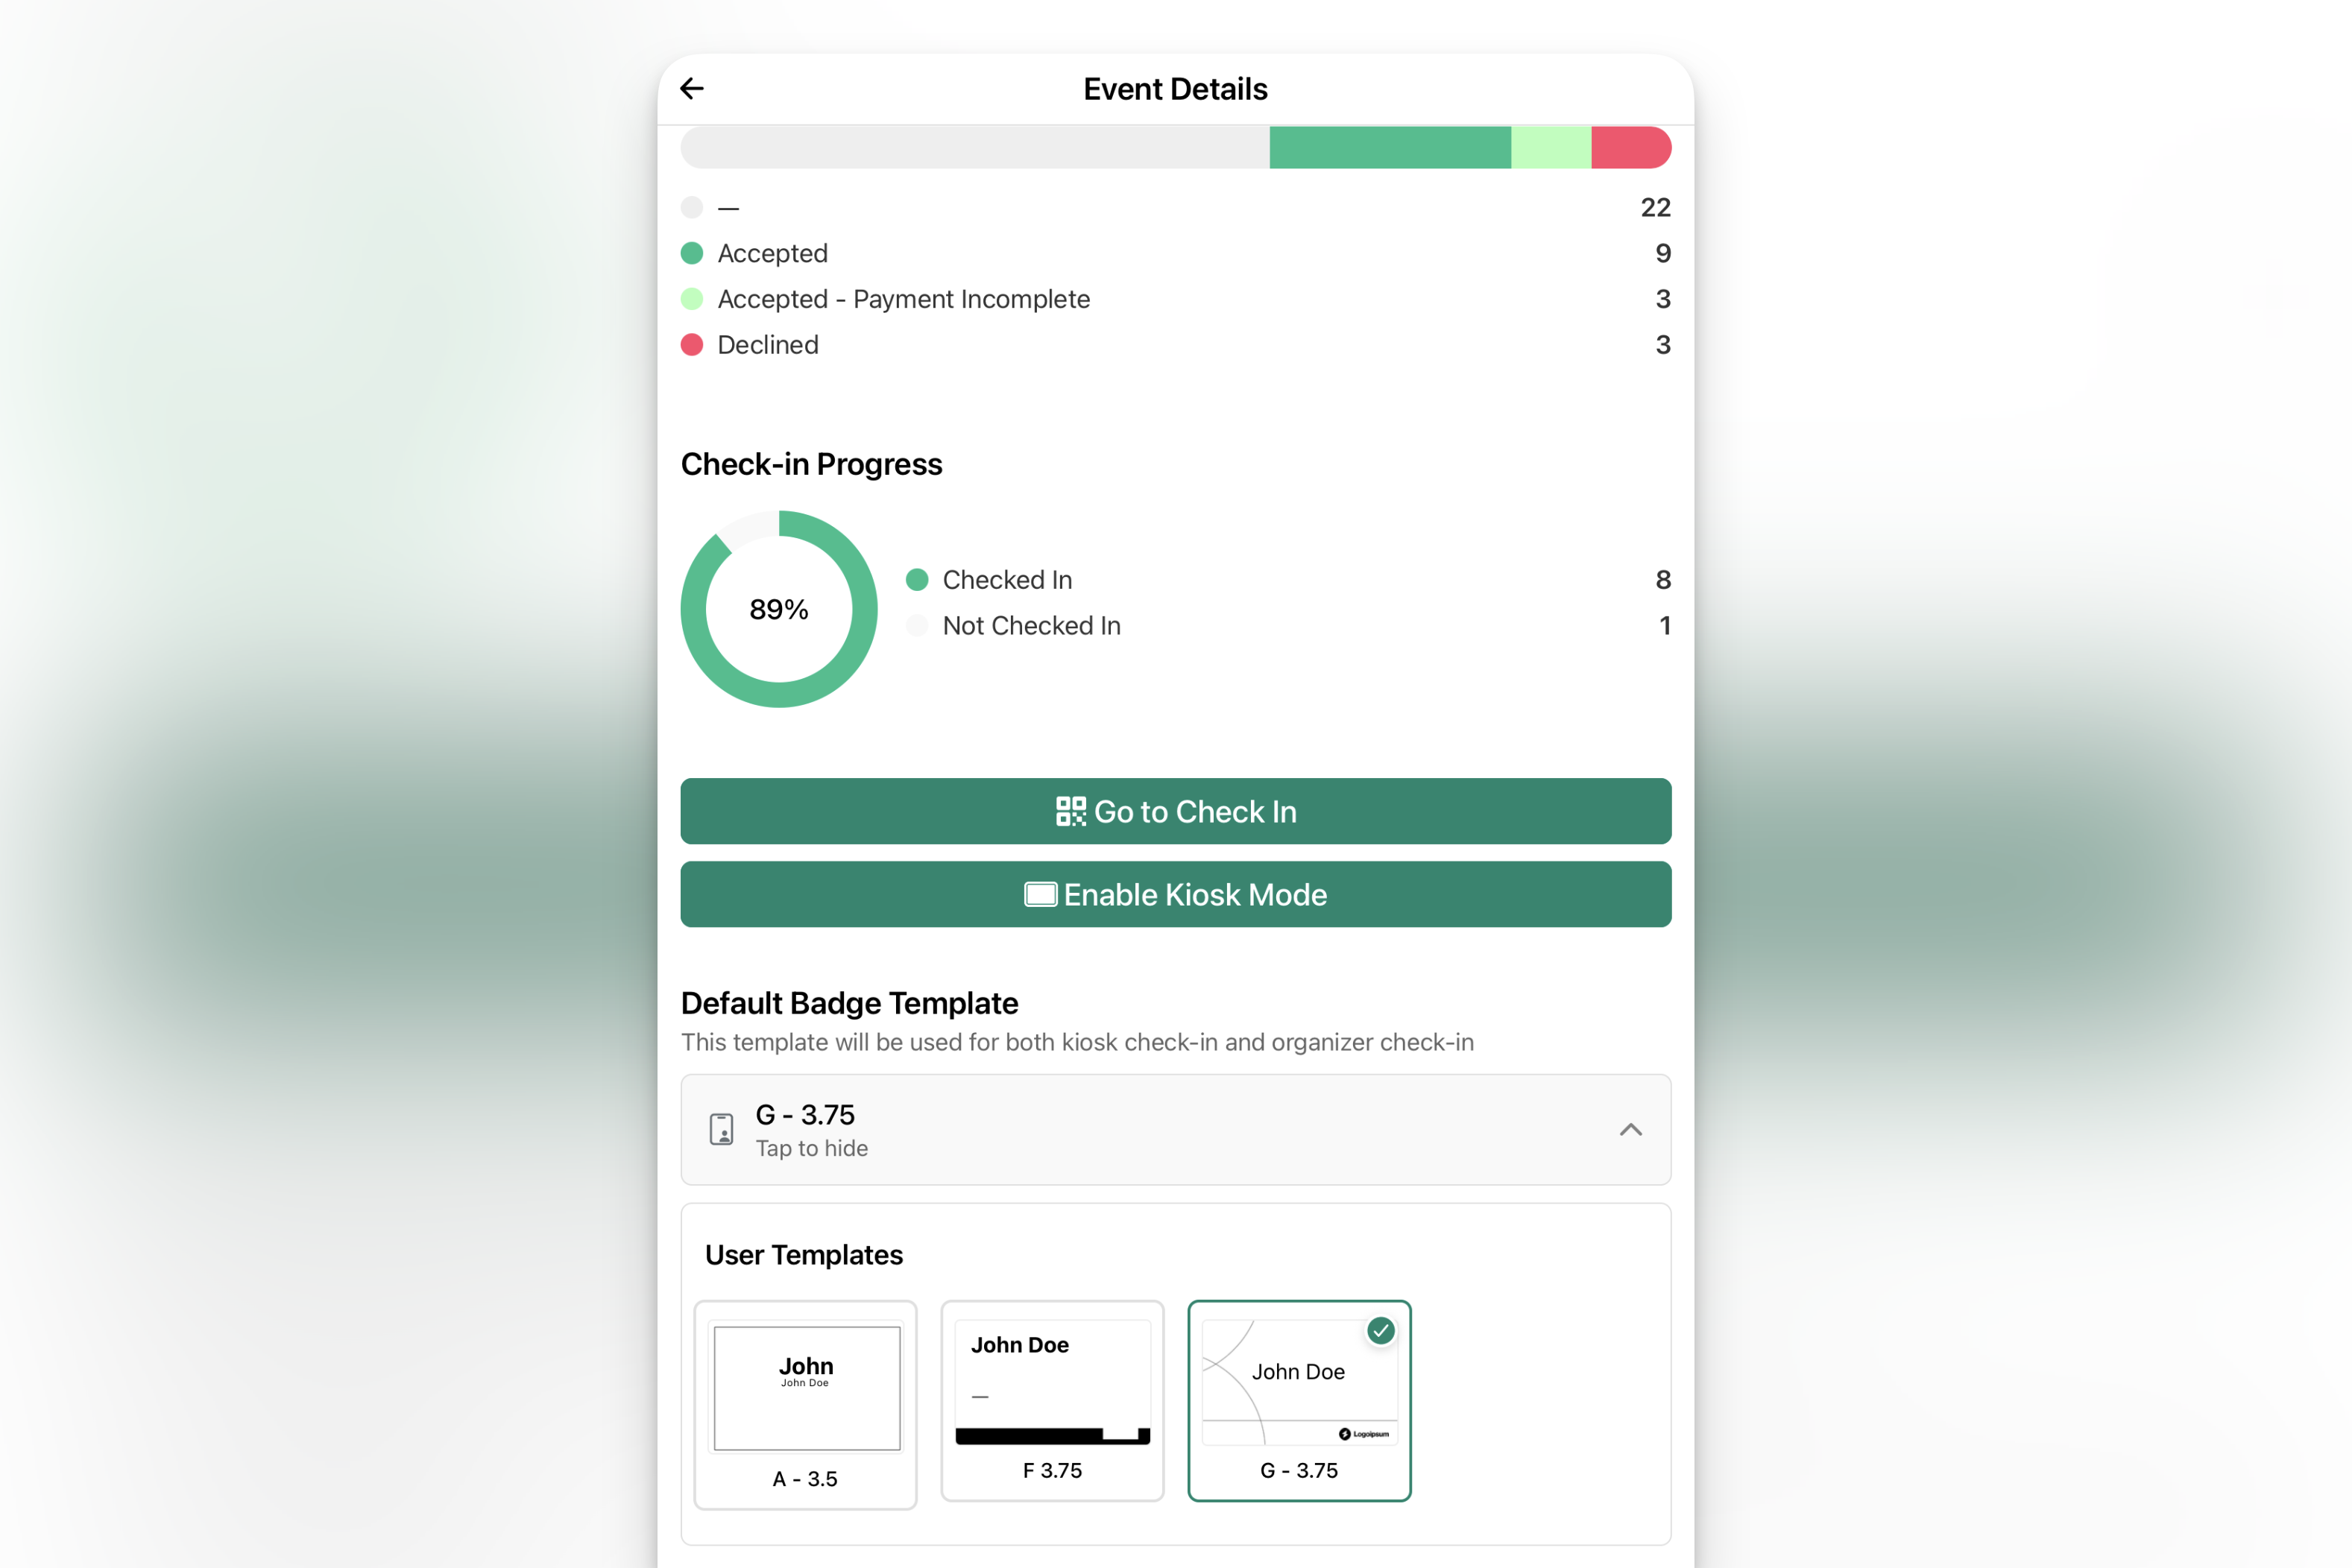
Configure Badge Template (optional)
Before enabling kiosk mode, set your default badge template. Tap the badge template dropdown right below the kiosk mode toggle.
-
Enable Kiosk Mode
Below the “Go to Check In” button, toggle on “Kiosk Mode”. You’ll see a search screen when Kiosk Mode is active.
-
Test the Flow
Search for a test guest, check them in, and print a badge to make sure everything works before your event starts. (You can undo check-in by leaving Kiosk Mode, and using the main check in tool.)
Exit Kiosk Mode
Instructions for exiting Kiosk Mode are available under Settings. You can also force quit the app to exit.
Guest Check-In Flow
Section titled “Guest Check-In Flow”When a guest approaches the iPad:
-
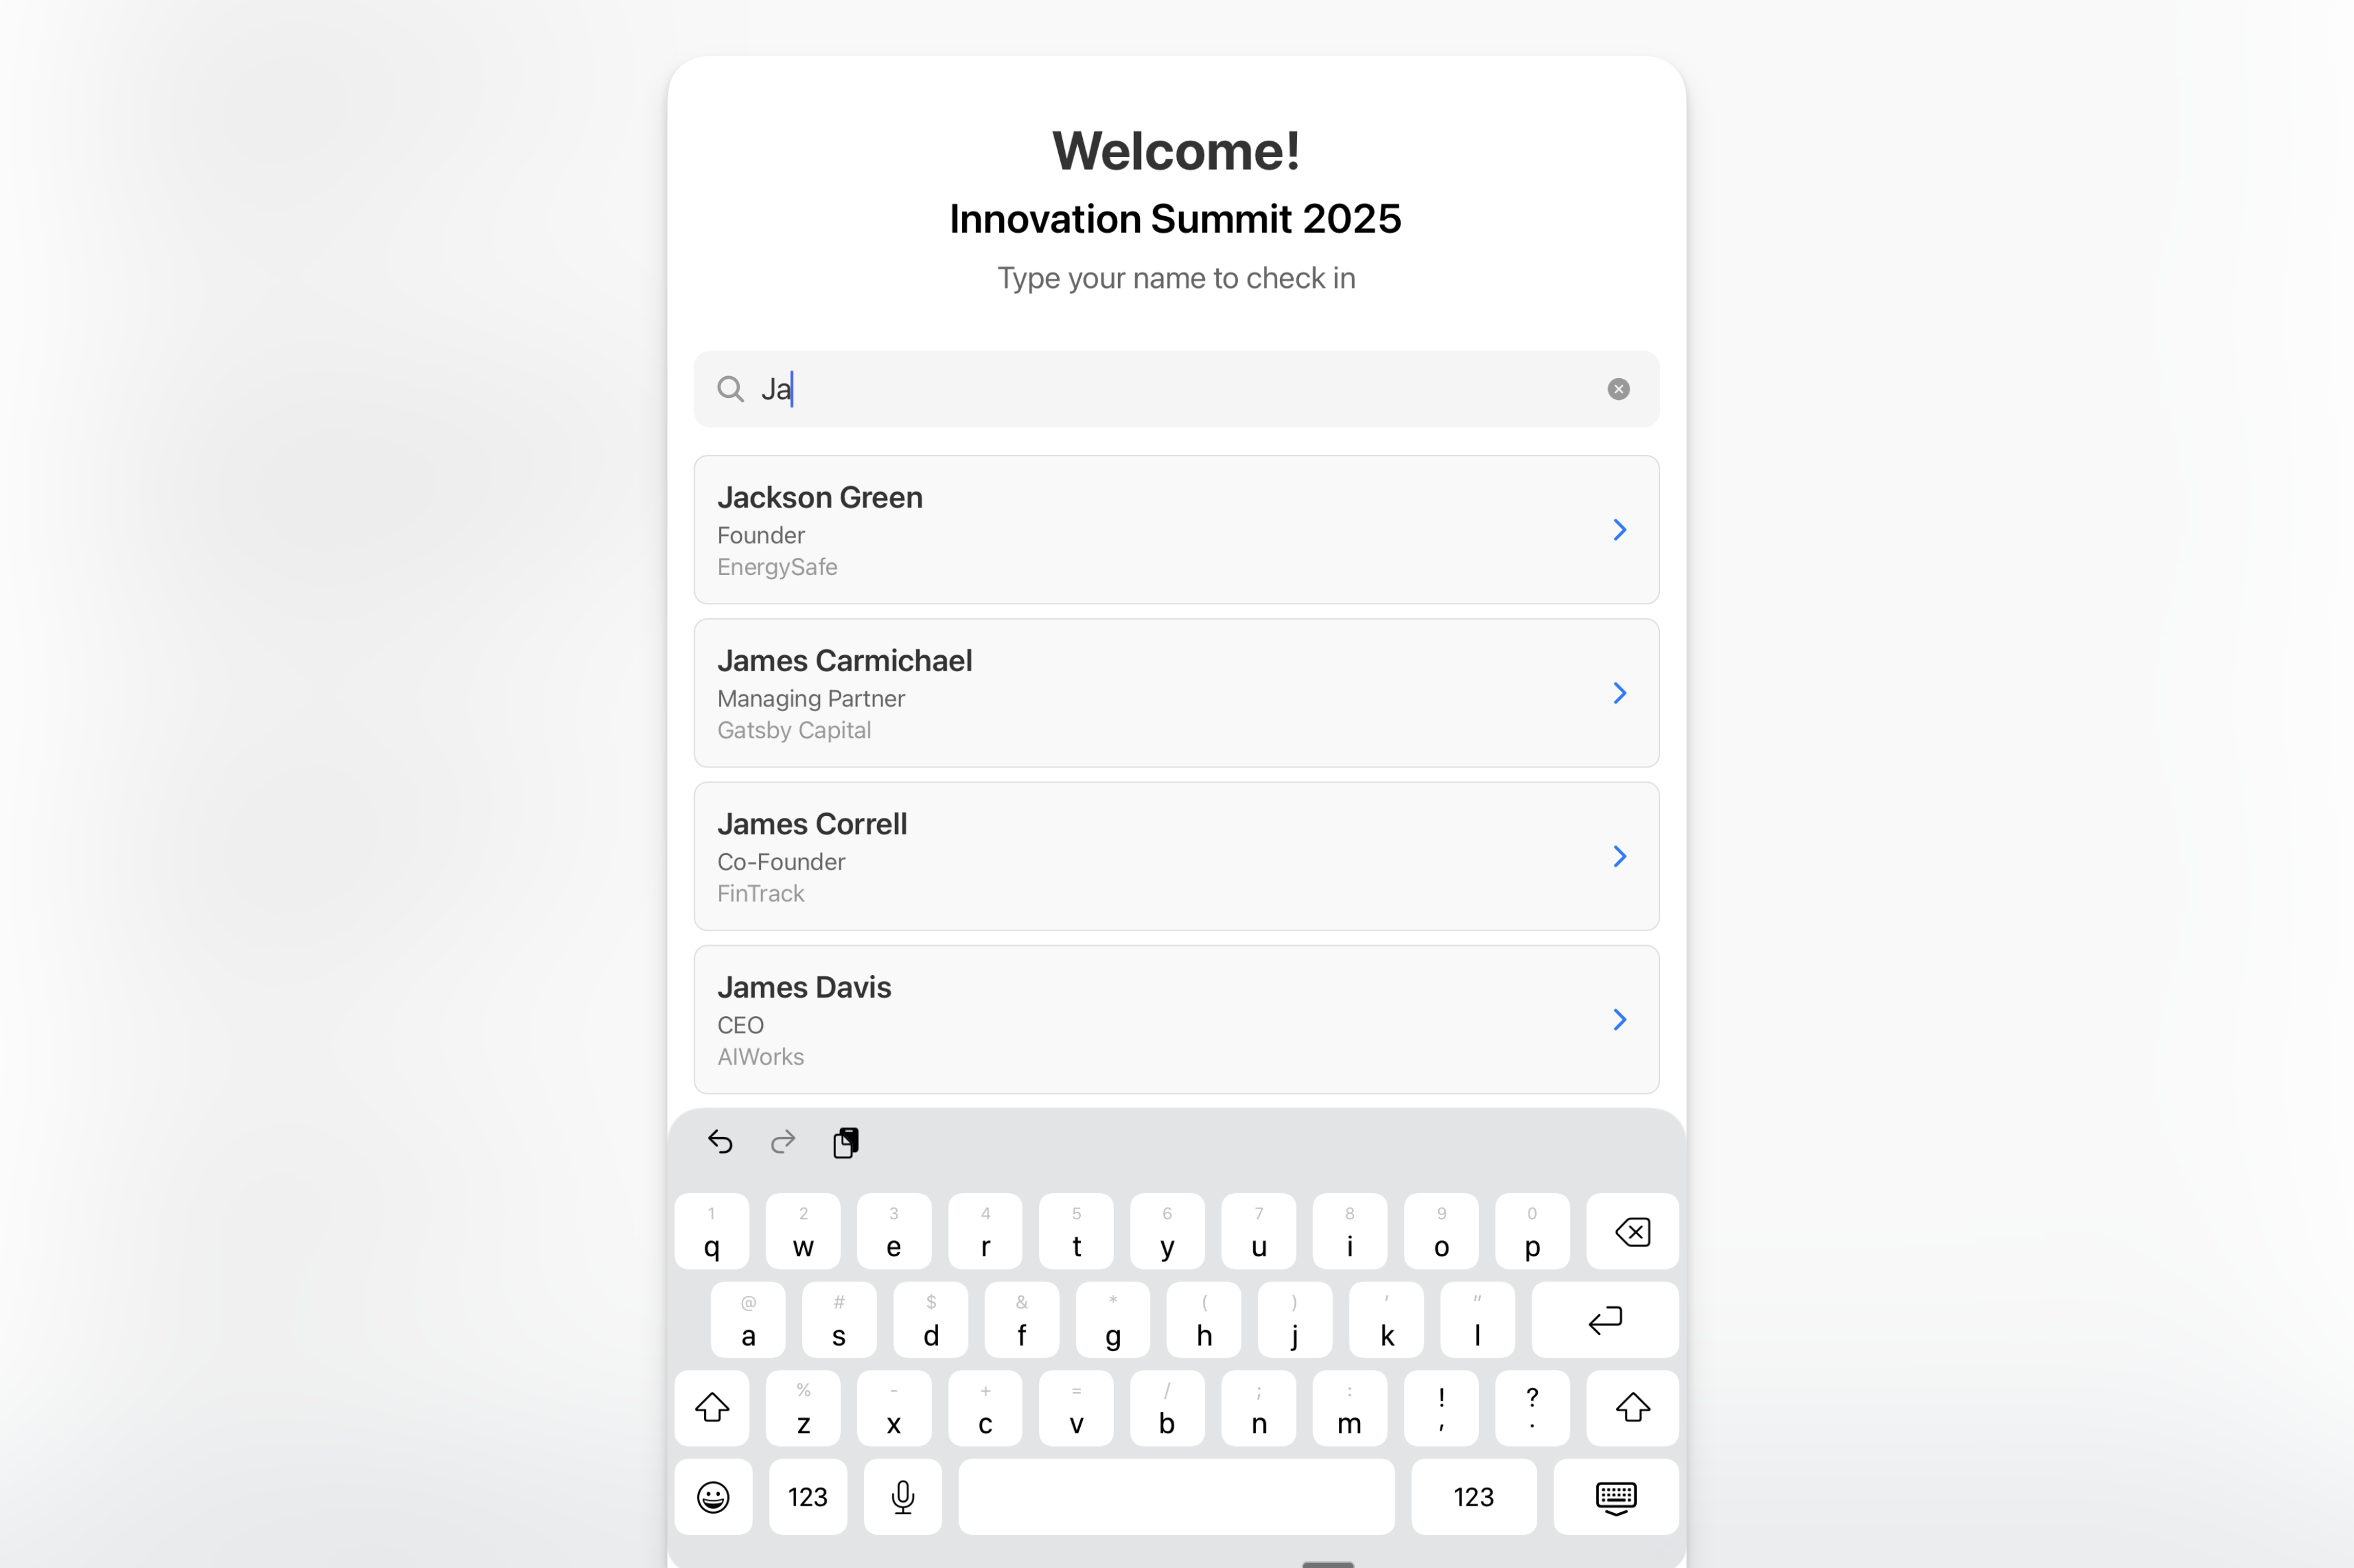
Type Name or Scan QR Code
The screen defaults to name search (or QR scanning, change this in Settings). Guest types their name.
-
Select Profile or Register
Tap once to close the keyboard, tap again to select their profile from the results. If no results are found, guests can register (if enabled).
-
Answer Questions
If you’ve set up registration questions (see below), guests answer them here. Required questions appear for everyone who hasn’t answered yet, even if they’re already on the guest list.
-
Print Badge
Guest can print their badge, edit badge information, or skip printing entirely. After they choose, kiosk mode returns to the name search screen for the next guest.
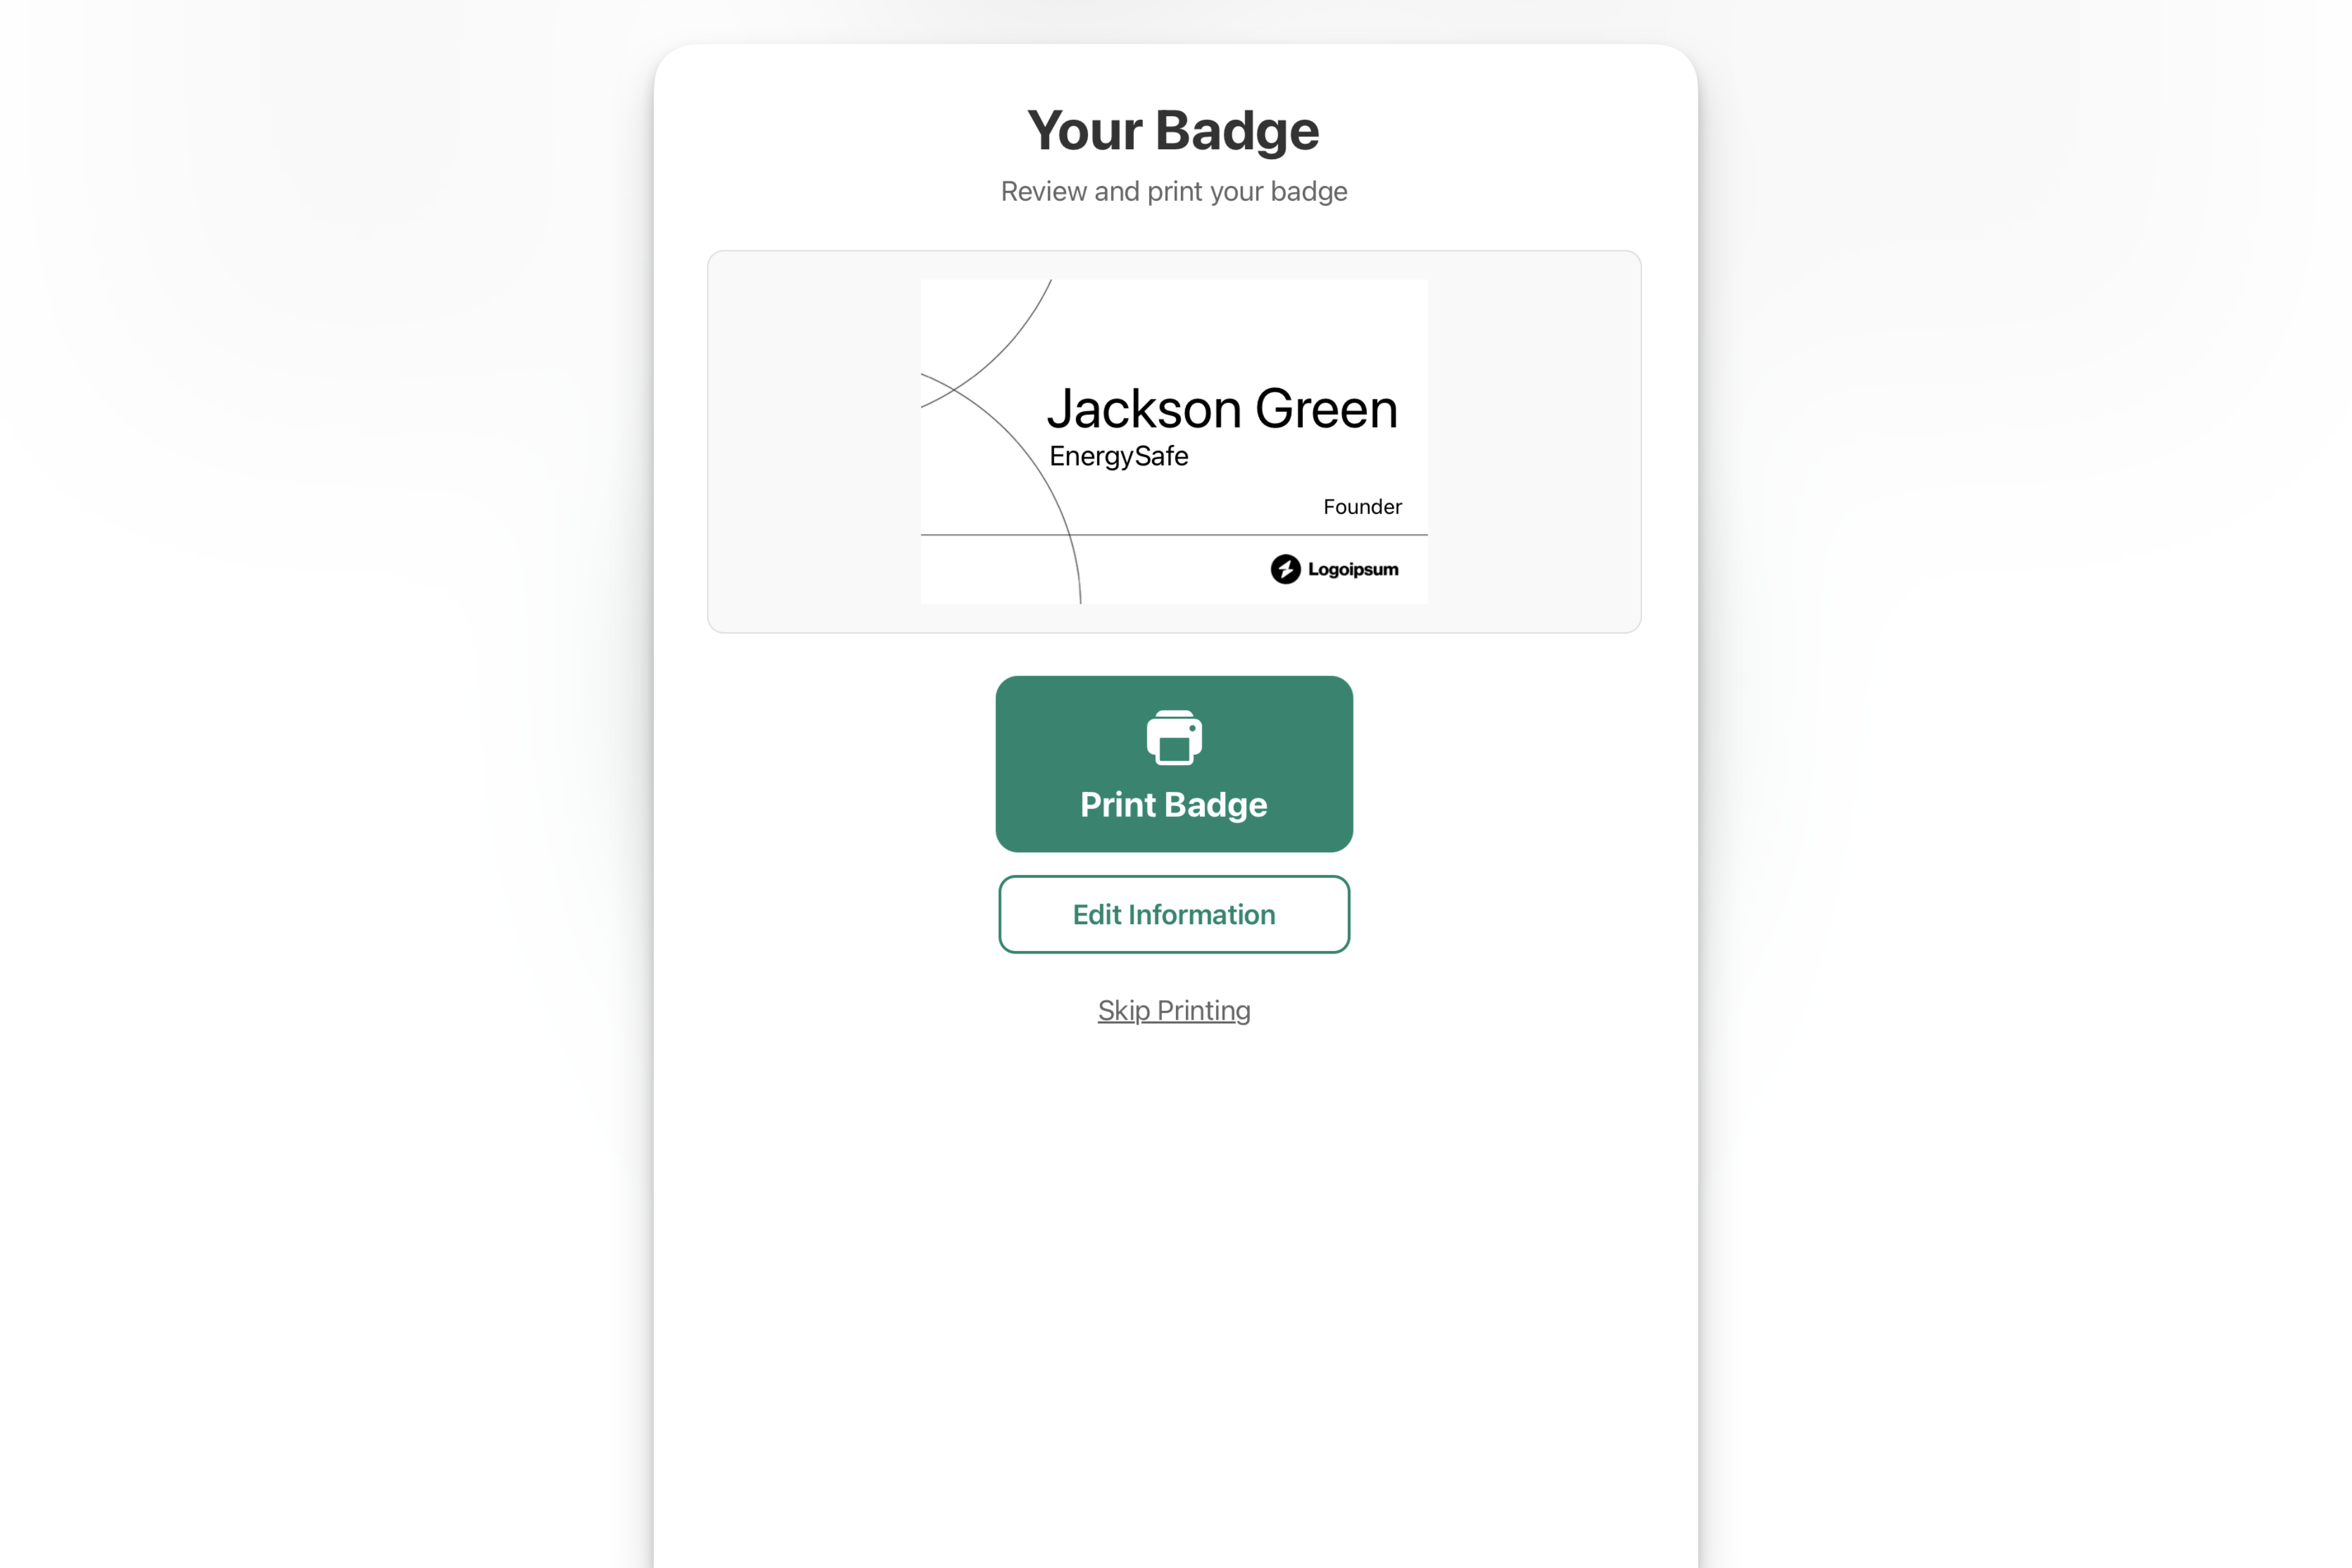
Note: when guests edit their badge, this info is not saved back to Gatsby to prevent data quality issues.
Walk-In Registration
Section titled “Walk-In Registration”When someone searches for their name and isn’t found, a “Walk-In Check-In” button can appear. Guests can register themselves on the spot:
-
Basic Information
Guest fills out name, email, phone, and company.
-
Custom Questions
Any registration questions you’ve configured appear next.
-
Badge Printing
Same options as invited guests… print, edit, or skip.
Set Up Registration Questions
Section titled “Set Up Registration Questions”Configure what information kiosk mode collects:
-
Open Event Settings
From your desktop or laptop, open your event.
-
Navigate to Mobile App
Go to the Mobile App tab, find “Registration Fields”.
-
Add Custom Fields
Registration questions must be Custom fields in Gatsby. Select an existing field or create a new one.
-
Configure Display
Set the display name and mark if the field is required. Required questions appear for walk-ins and existing guests who haven’t answered yet.
These registration questions appear after guests enter their basic information (name, email, phone, company).
Lock Down the iPad with Guided Access
Section titled “Lock Down the iPad with Guided Access”iOS Guided Access locks your iPad to the Gatsby app so guests can’t exit to other apps or settings.
-
Enable Guided Access
On your iPad, go to Settings » Accessibility » Guided Access. Enable the Accessibility Shortcut.
-
Start Kiosk Mode
Enable kiosk mode for your event in the Gatsby app, then triple-click the side button (or home button on older iPads).
-
Configure Options
Disable touch in areas you want to restrict, or leave the screen fully interactive. Tap Start in the top right.
-
Exit When Needed
Triple-click the side/home button again and enter your passcode to exit Guided Access.
Test Guided Access before your event starts. Make sure you remember your passcode… you’ll need it to exit.
Check In via Web
Section titled “Check In via Web”-
Access Check-In
On your events dashboard, look for the green “Check In” button closeto the day of your event. Click it to open the check-in interface.
To start check-in early, click the three dots on your event tile and select “Check In Guests” from the dropdown.

-
Mark Arrivals
As guests arrive, click the checkmark next to their name to mark them as having attedend your event.
Add to your calendar

Add to your calendar