Customizing the Calendar Invite
Effortlessly manage event scheduling with Gatsby. Block off calendars, send customizable invites, and streamline RSVPs for high-stakes corporate events.
Calendar invites help your guests block off time for your event. You can customize the organizer, description, and other details while Gatsby automatically syncs the core event information.
Setting up Calendar Invites
Section titled “Setting up Calendar Invites”-
Access calendar settings
Go to your RSVP page and click “Calendar Invite” in the left menu.
-
Choose an organizer
Select who appears as the event organizer. Consider using an
events@yourdomain.comaddress since each guest gets an individual invite, which means the organizer will see duplicate events on their calendar. -
Customize the invite content
Click “Edit” to modify the calendar invite details. The event name, time, and location sync automatically from your event settings, but you can override them here if needed.
-
Write your description
Add context about the event. Keep in mind that images and custom fonts aren’t supported in calendar invites.
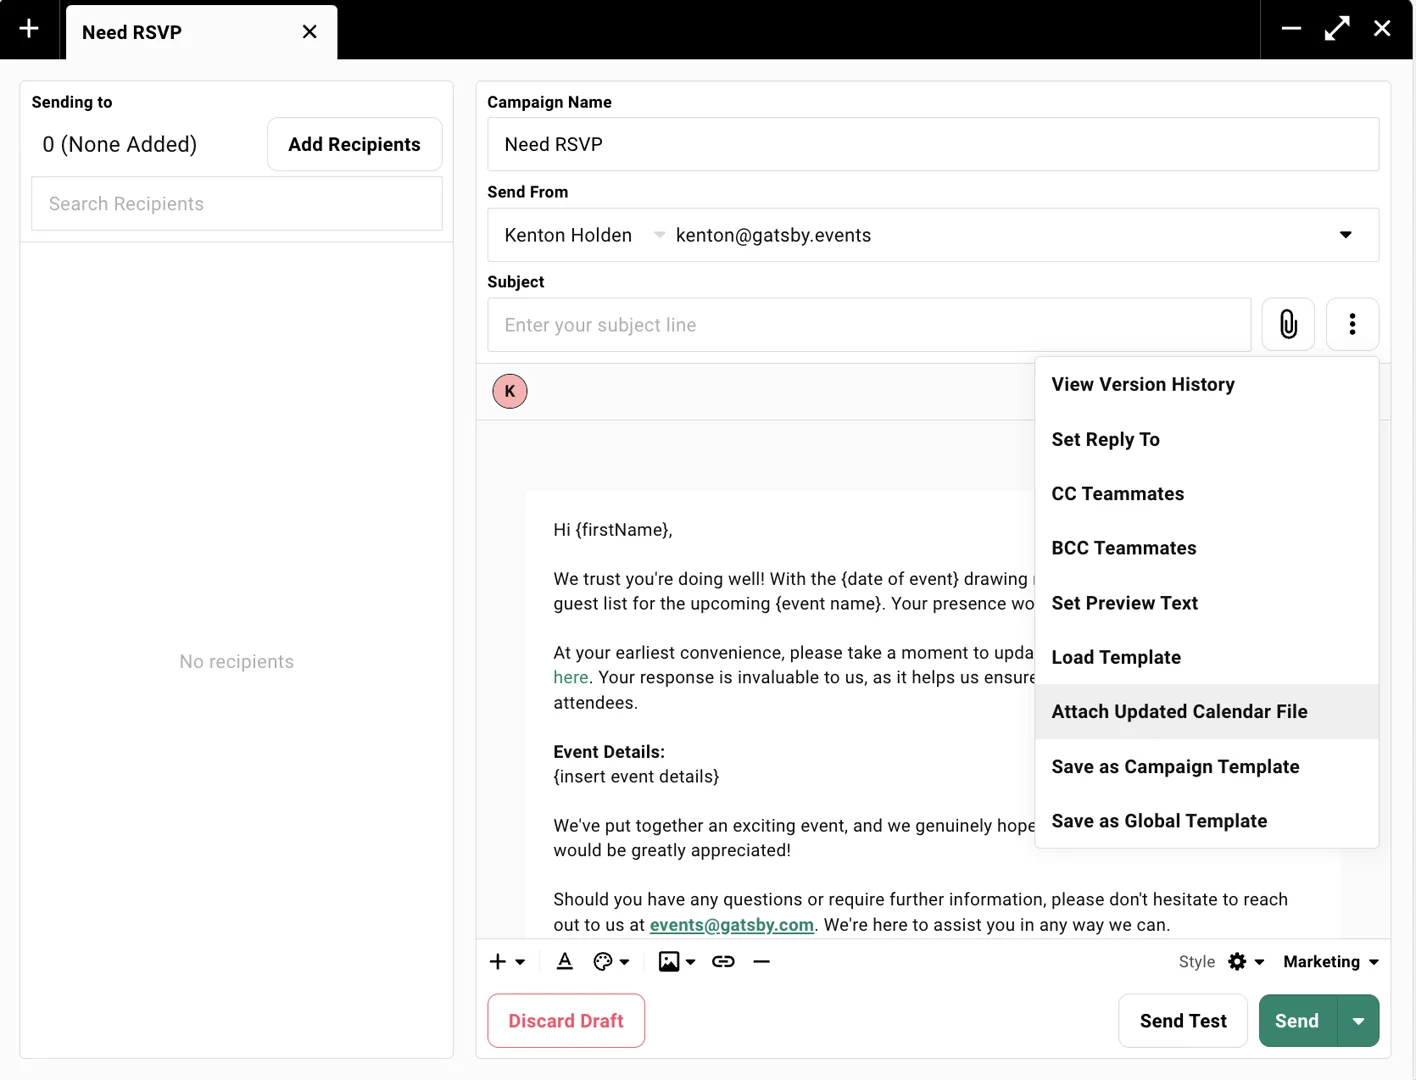
Adding Calendar Invites to Campaigns
Section titled “Adding Calendar Invites to Campaigns”-
Open your campaign
Navigate to the campaign page and either start a new campaign or open an existing draft.
-
Attach the calendar invite
Click the three dots next to the subject line and select “Attach Calendar Invite.”
Setting Team-Wide Defaults
Section titled “Setting Team-Wide Defaults”Establish default settings for confirmation emails and calendar organizers that apply to all new events.
Default Calendar Organizer
Section titled “Default Calendar Organizer”The calendar organizer is who appears as the host on calendar invites. Choose carefully because each guest receives an individual calendar invite, so the organizer will have duplicate events on their calendar.
-
Open Team Settings
Go to “Team Settings” from your dashboard.
-
Find Calendar Organizer Section
Scroll to the “Calendar Organizer” section.
-
Edit Display Name
Click on the name to change how the organizer appears on invites.
-
Select Organizer Email
Click the dropdown next to the email and choose your desired organizer.
Pro tip: Consider using a dedicated events email address as the calendar organizer to avoid cluttering personal calendars with duplicate invites.
Common Questions
Section titled “Common Questions” Can I use custom fonts in calendar invites?
No. Spam filters are strict about fonts, so we restrict calendar invites to email-safe fonts to ensure delivery.
Can I change the calendar organizer after sending invites?
You can, but it’s better to do this before the initial invite goes out. Otherwise, guests will receive multiple calendar events. The organizer will also see duplicate events on their calendar.
If you need to change just the display name (not the email), use the dropdown arrow next to the organizer name.
Are calendar invites included automatically?
Calendar invites are sent to guests via the confirmation email by default. The confirmation email is sent automatically after your guests register for an event.
Do calendar invite responses sync back to Gatsby?
A connected/integrated Google account, if set as the calendar invite organizer, will report back under the “Calender Invite Status” column. Include the RSVP link in the calendar invite description so guests can easily update their responses in Gatsby.
Why does each guest get a separate calendar invite?
Due to technical constraints, Gatsby creates individual calendar invites for each guest. This is why we suggest using an events email address or SendGrid account as the organizer to avoid cluttering your personal calendar.
Add to your calendar
Add to your calendar