Guide: Your First Event in Gatsby
Step-by-step walkthrough to create, manage, and run your first event from start to finish. This guide covers the core workflow that powers executive dinners, investor meetings, and professional gatherings
The best way to learn Gatsby is by using it. Start with a simple event and build confidence with the core workflow before adding advanced features.
Part 1: Create an Event
Section titled “Part 1: Create an Event”-
Create Event
From your dashboard, click “Create Event.” You only need a name to get started—everything else can be configured later.
-
Add Basic Details
Set your event name, date, time, and location. You can always change these later.
-
Use a Template
Templates come with different website designs, example emails, and guest list tabs. They’re worth exploring as you learn.
Understanding Event Tools
Section titled “Understanding Event Tools”Once your event is created, you’ll see these main tools:
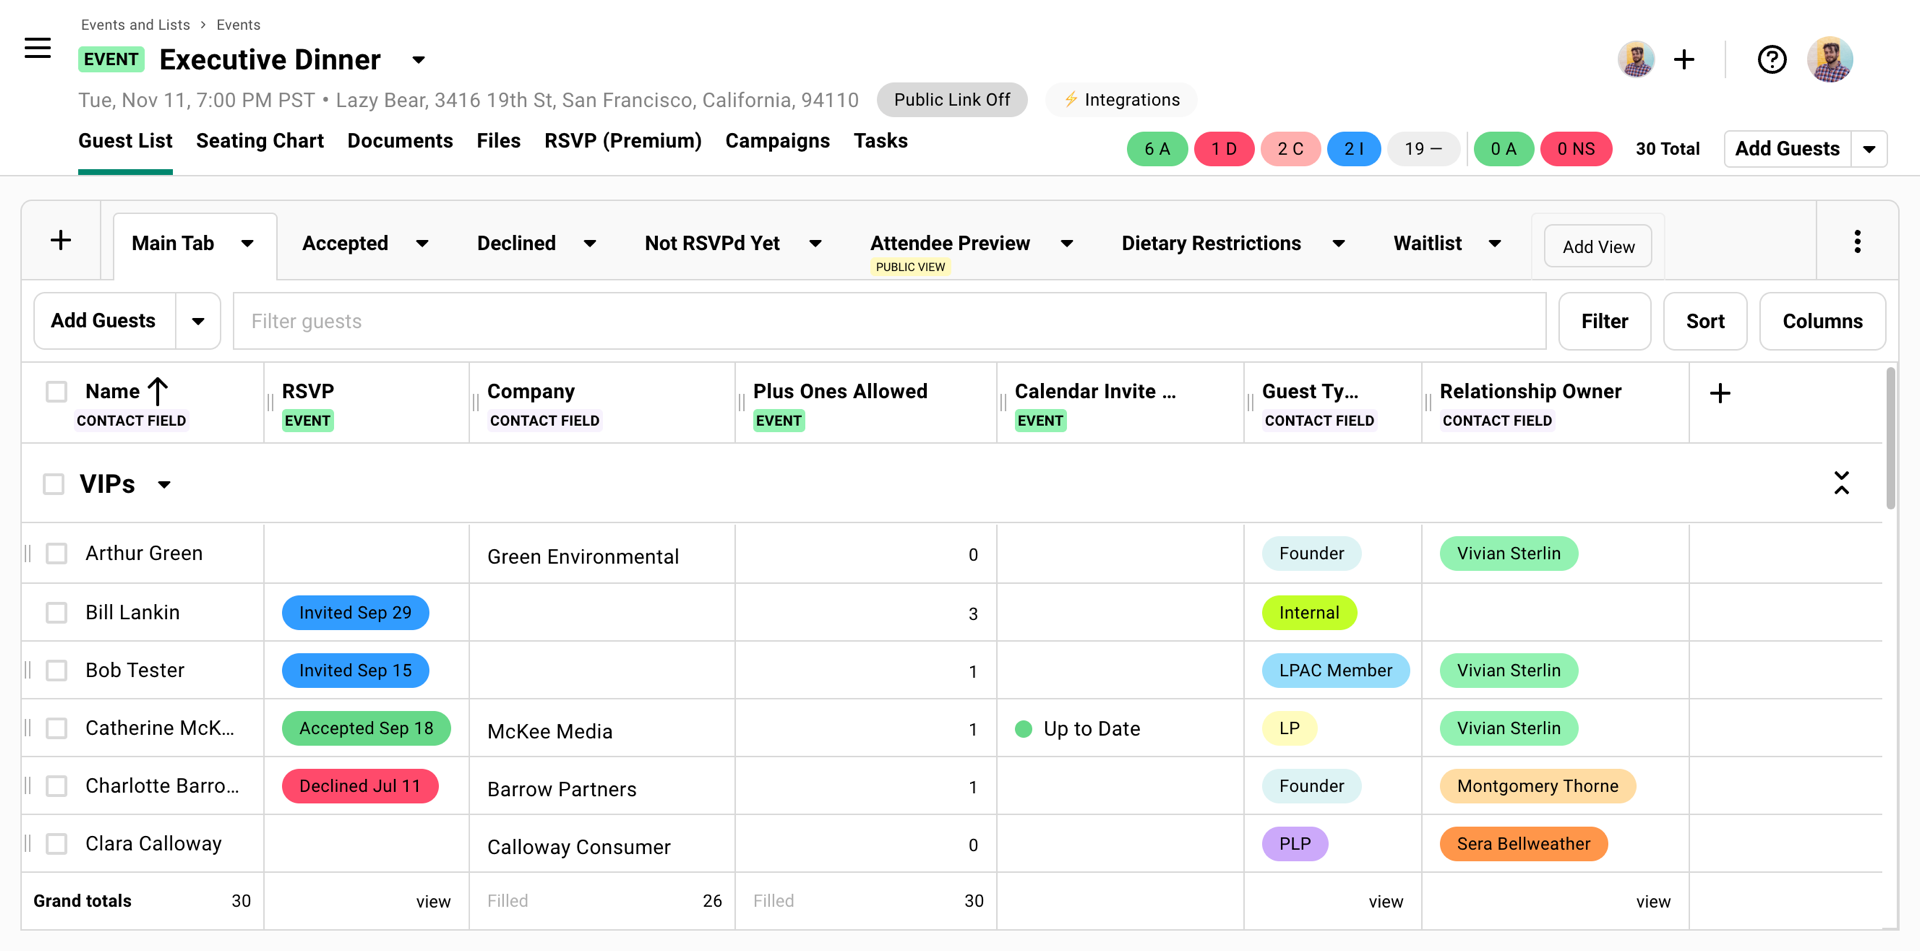
Guest List: Your spreadsheet of attendees with RSVP tracking, custom fields, and filtering options.
RSVP: Where you build the registration website guests see when they click your invitation link.
Campaigns: The emails you send to guests (invitations, reminders, updates).
Additional Tools: Seating charts, documents, tasks, and day-of check-in tools.
Part 2: Add Guests
Section titled “Part 2: Add Guests”Your guest list is the foundation of everything else. Add guests from other events/lists, one at a time, or upload from a CSV.
Start by adding yourself to the guest list!
Upload Guests
Section titled “Upload Guests”Most teams start here since you probably have a list in Excel or Google Sheets.
Follow these steps
-
Prepare Your File
You need at minimum: Name and Email. Everything else (company, position, dietary restrictions) is optional but helpful. Export from Excel to CSV.
-
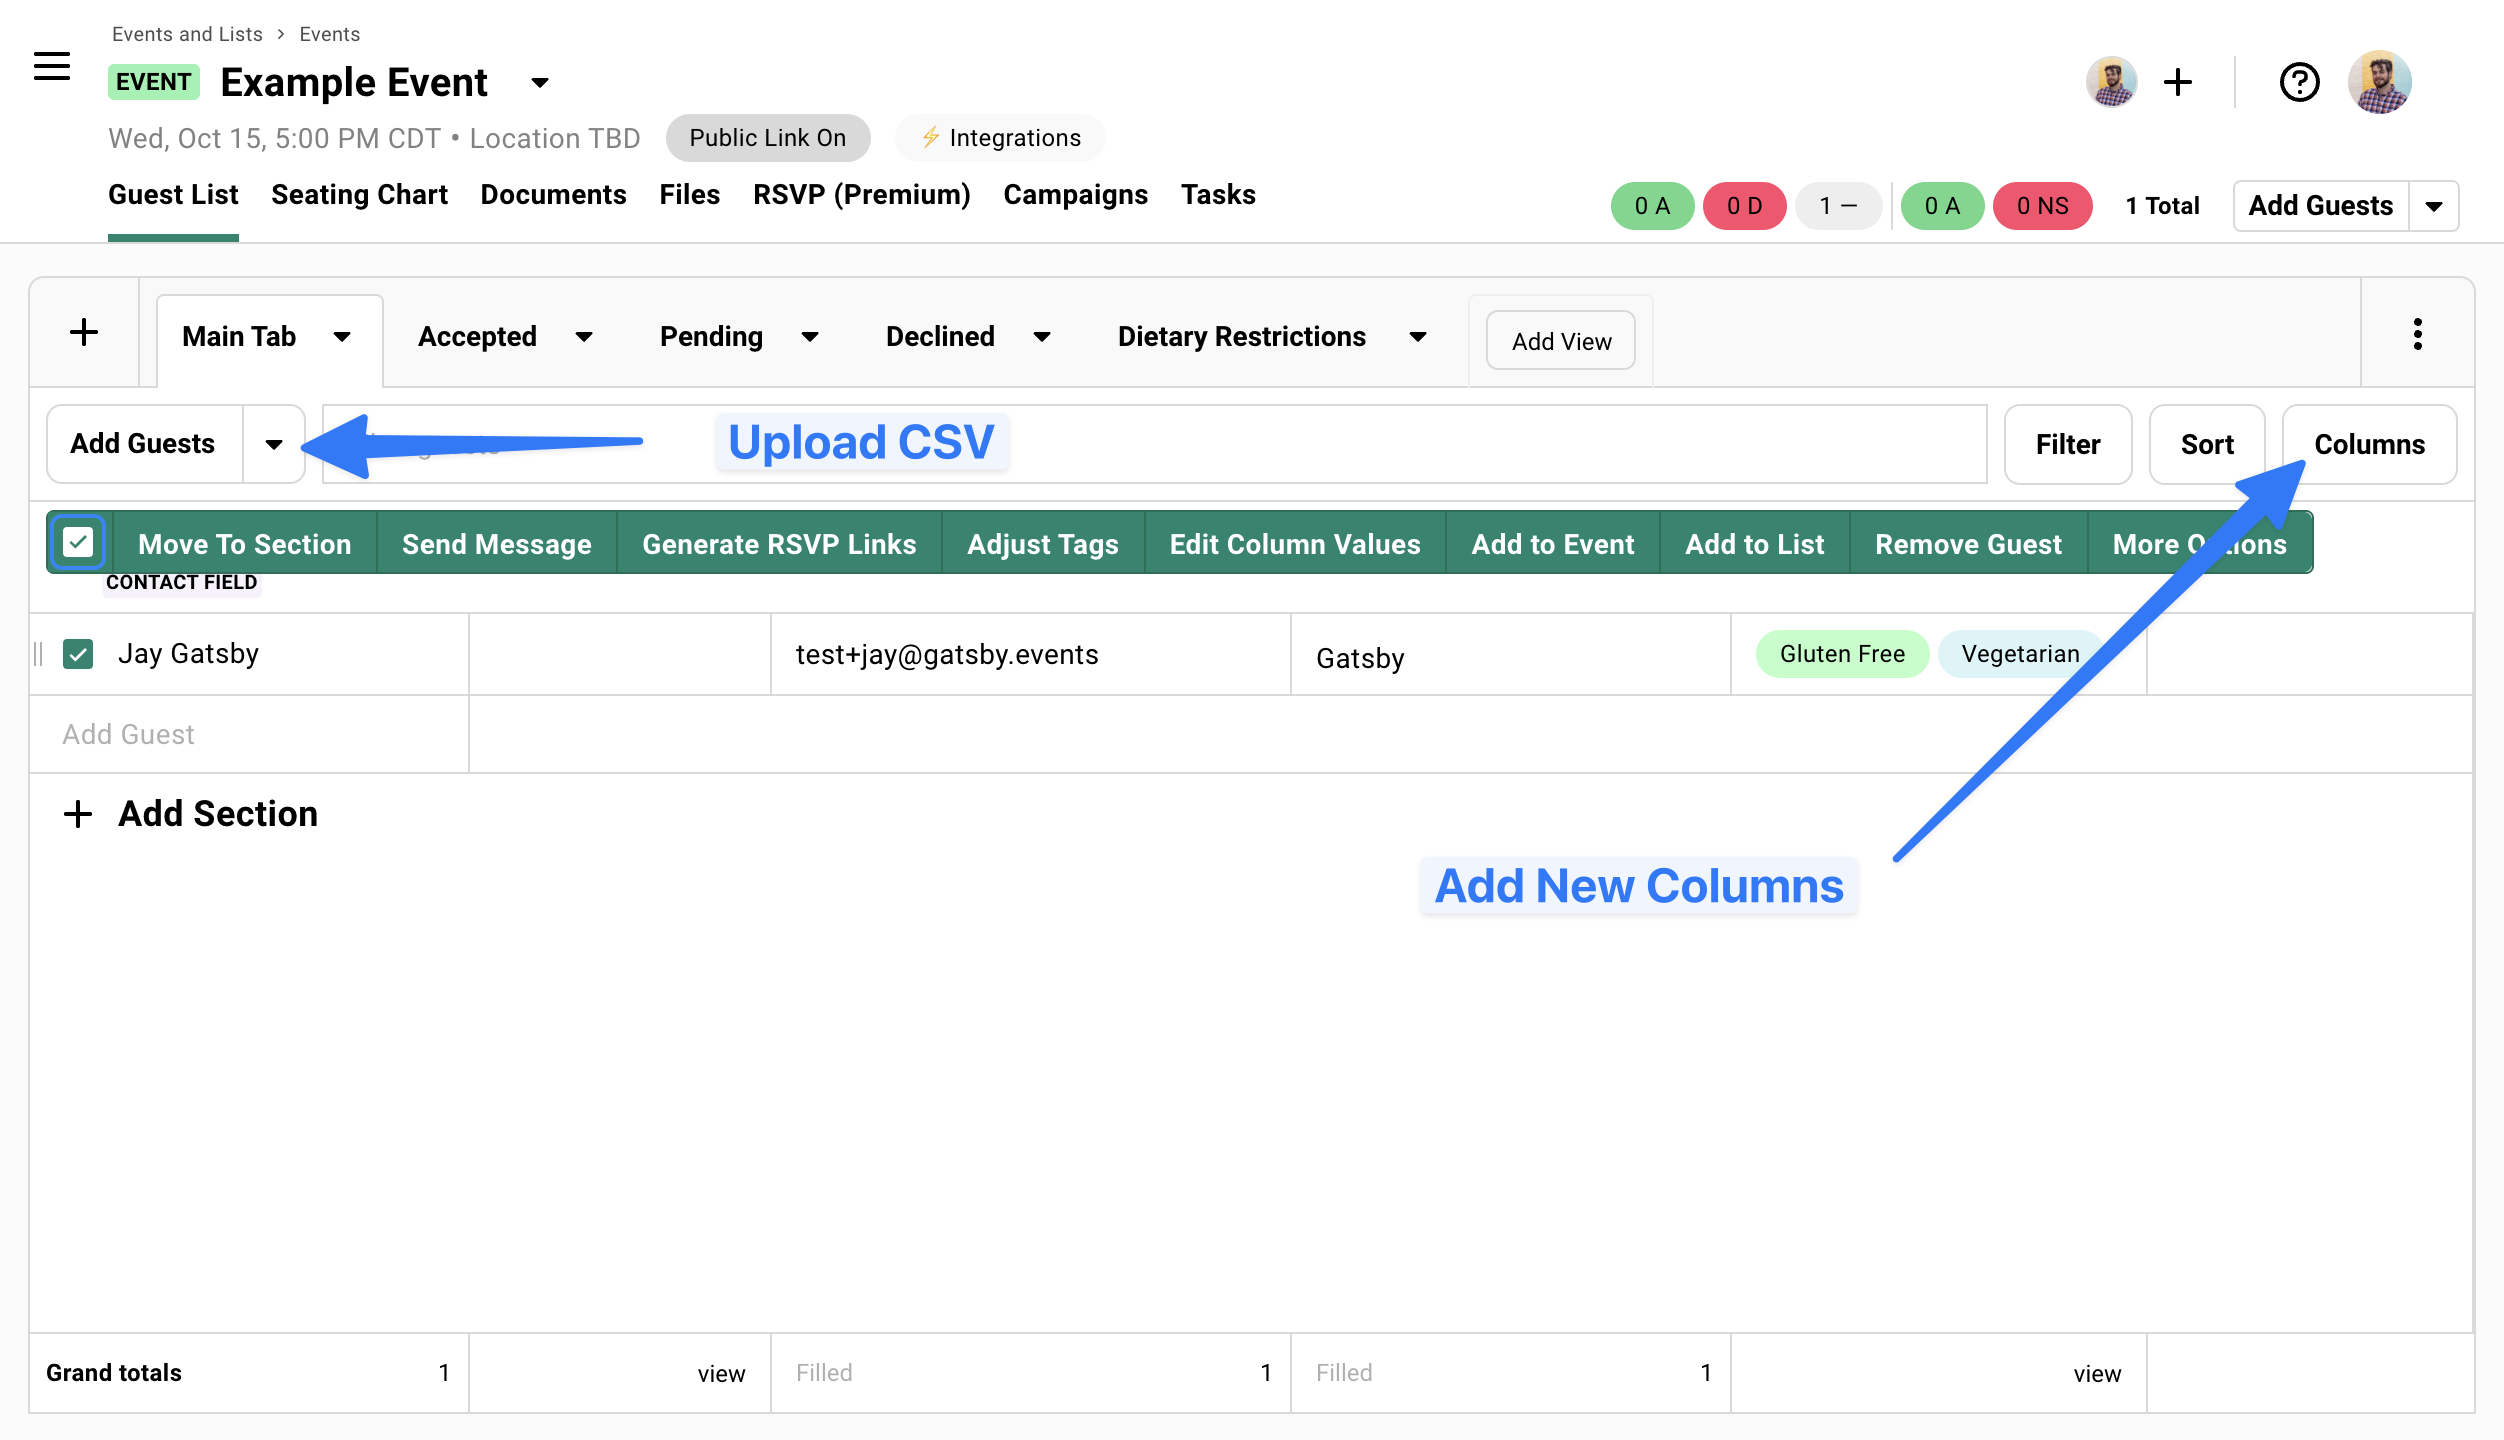
Access CSV Import Tool
In your event, click the dropdown next to “Add Guests” and select “Upload CSV.”
-
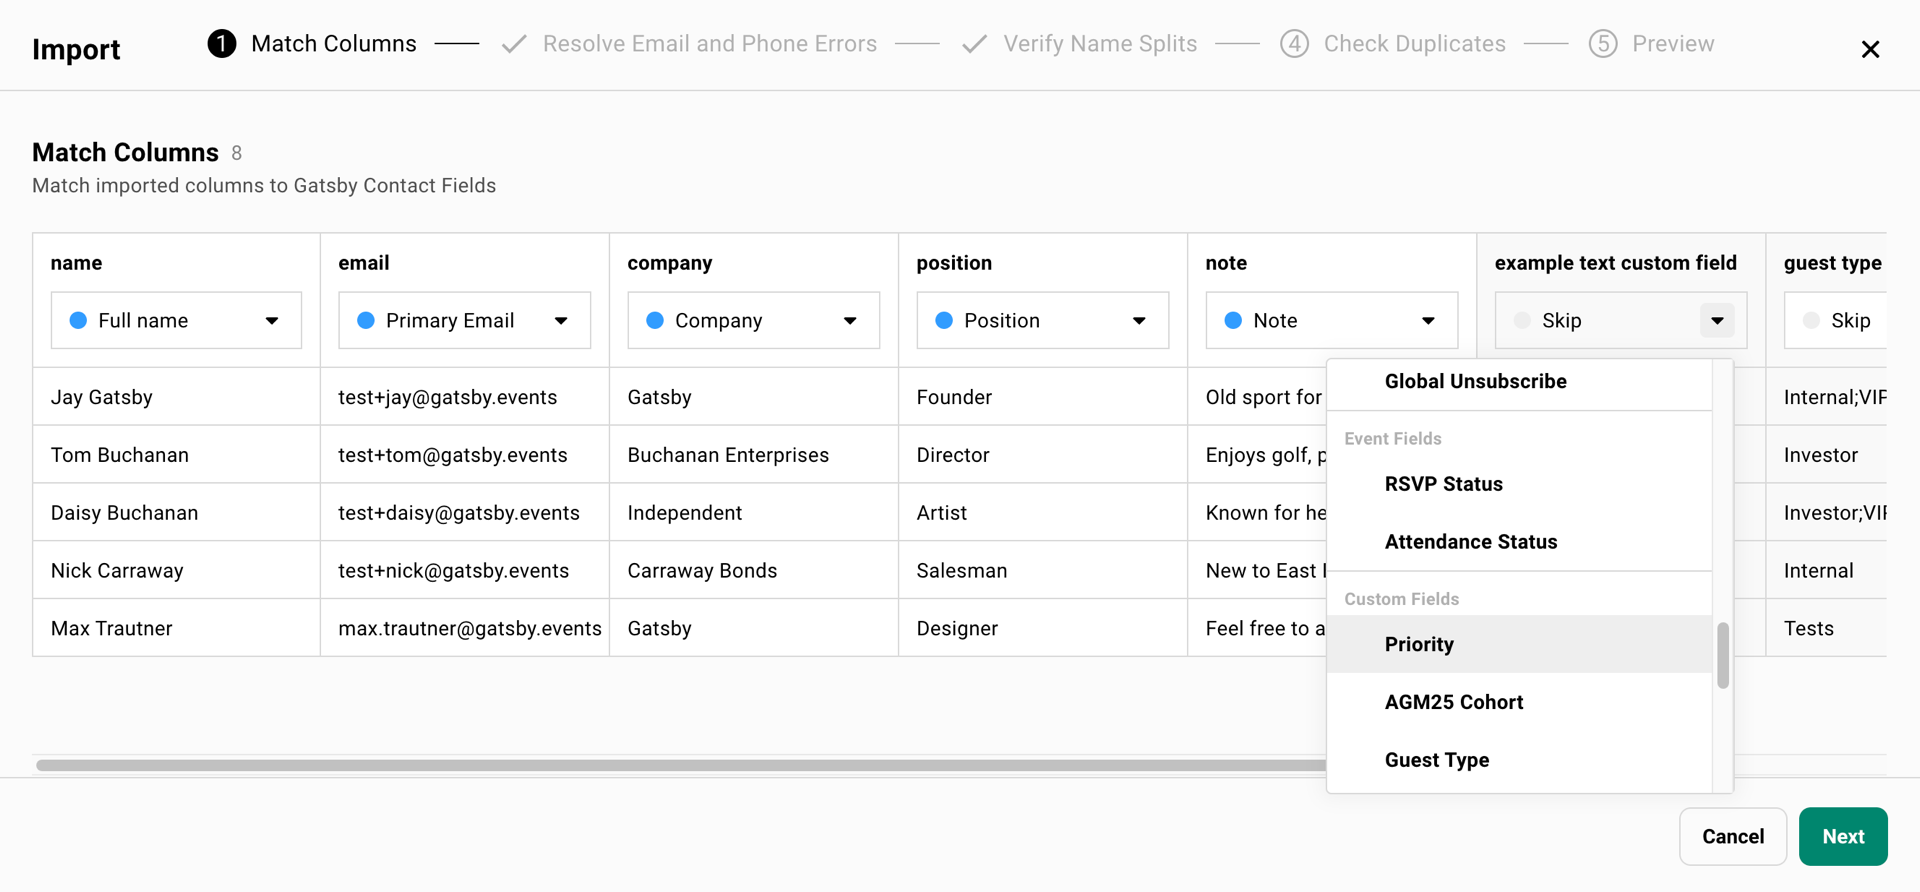
Map Your Fields
Gatsby will match your spreadsheet columns to its fields. If you have custom data (like “Guest Type” or “Investment Focus”), you can create new fields during upload.
-
Handle Duplicates
The system checks for existing contacts by email address and offers to merge or update information rather than creating duplicates.
The most important field is email address. Gatsby tracks unique contacts and prevents duplicates by referencing the email address field (think of like a unqiue ID for your guests).
Learn more about uploading contacts here.
Learn more about the guest list here.
Part 3: Configure Registration
Section titled “Part 3: Configure Registration”The RSVP tool is where you configure and build the regsitration experience for your event.
Registration Settings
Section titled “Registration Settings”-
Set Registration Status
Choose “Open” for normal registration or set to “Waitlist” to require your approval.
-
Add Capacity Limits
Set maximum attendees if your venue has space constraints.
-
More Settings
Configure Plus-Ones, turn on/off buttons, and more from this menu of options.
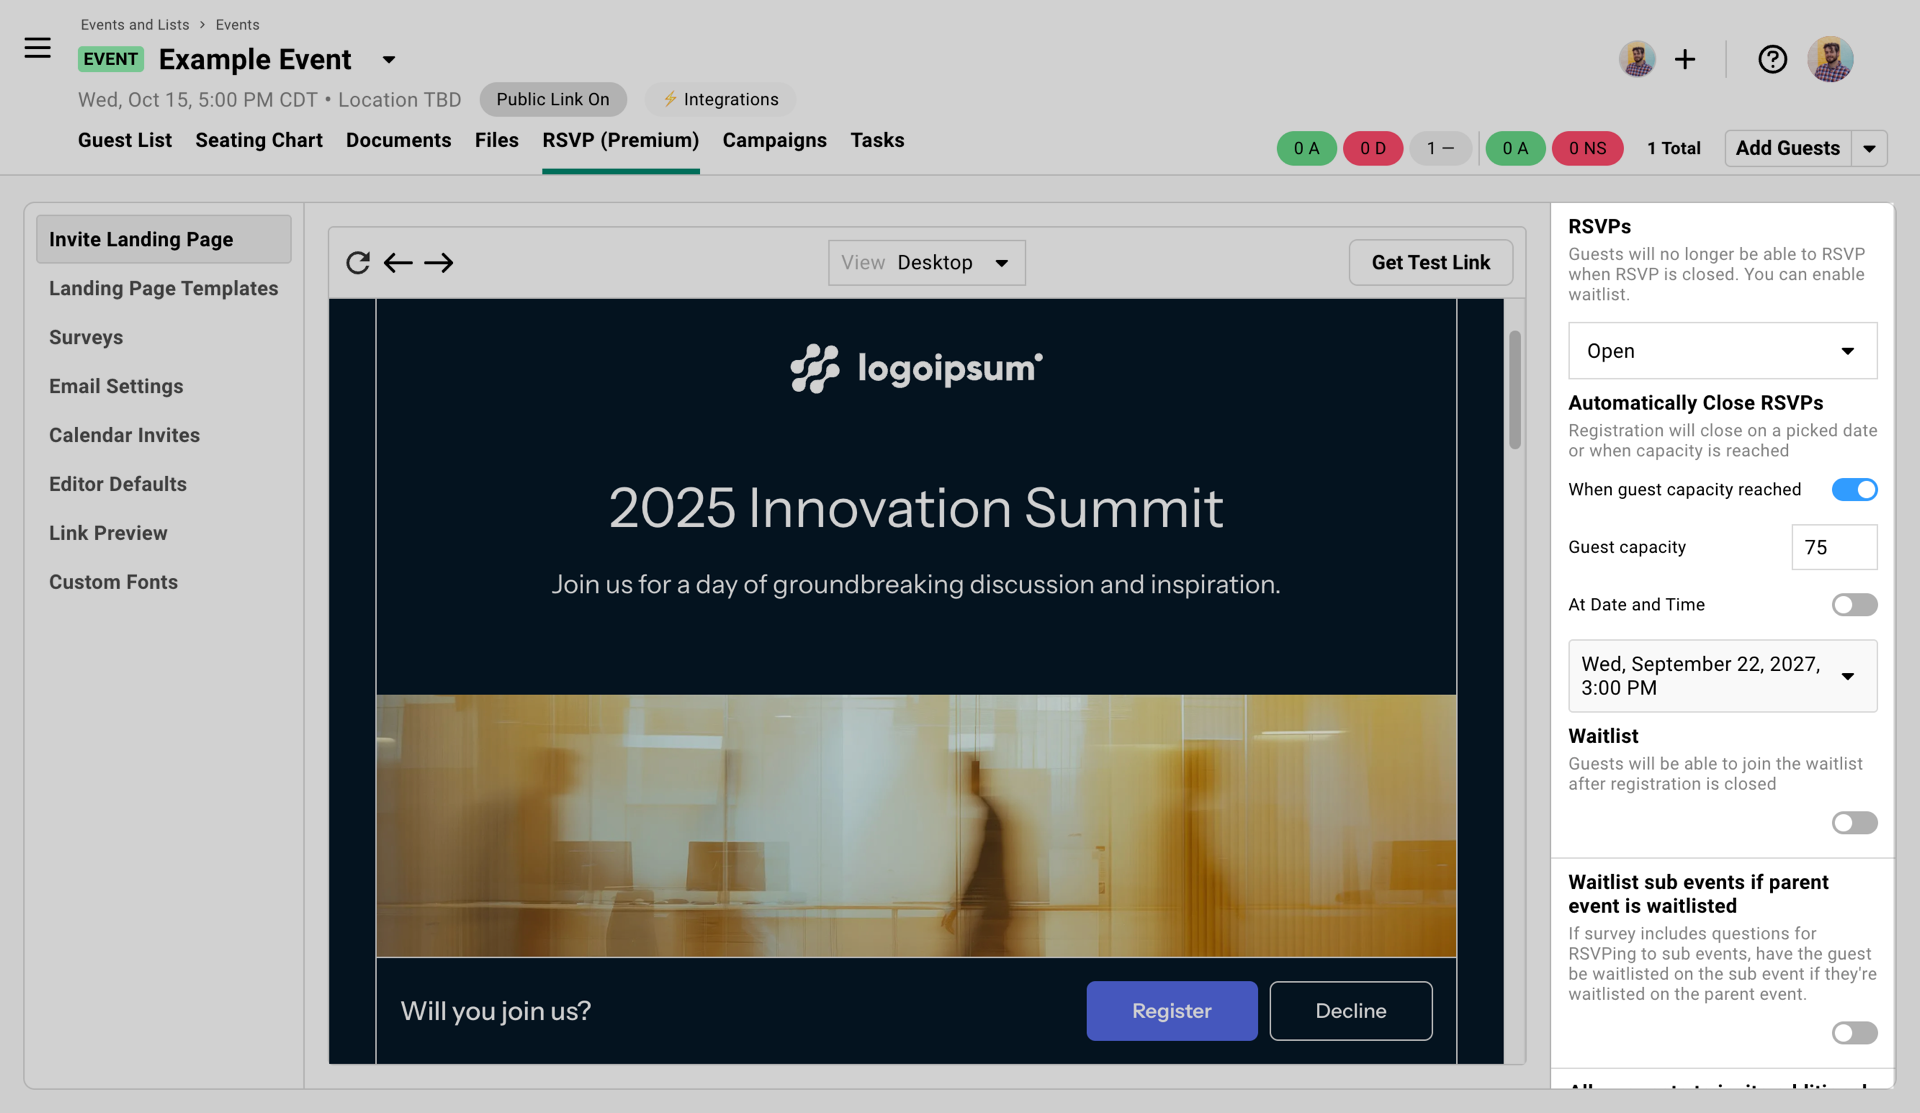 Review the settings in this area to configure registration settings for your event.
Build a Landing Page
Section titled “Build a Landing Page”This is the website guests see when they click a link that you send them to RSVP.
-
Access Landing Page Templates
Go to RSVP » Landing Page Templates » Global Templates to see pre-designed options.
“Templates” just means versions of your event website.
-
Choose a Template
Browse the templates and select one that fits your event style. You can customize everything later. Select the Duplicate to Event option to make a copy inside of your event that you can edit.
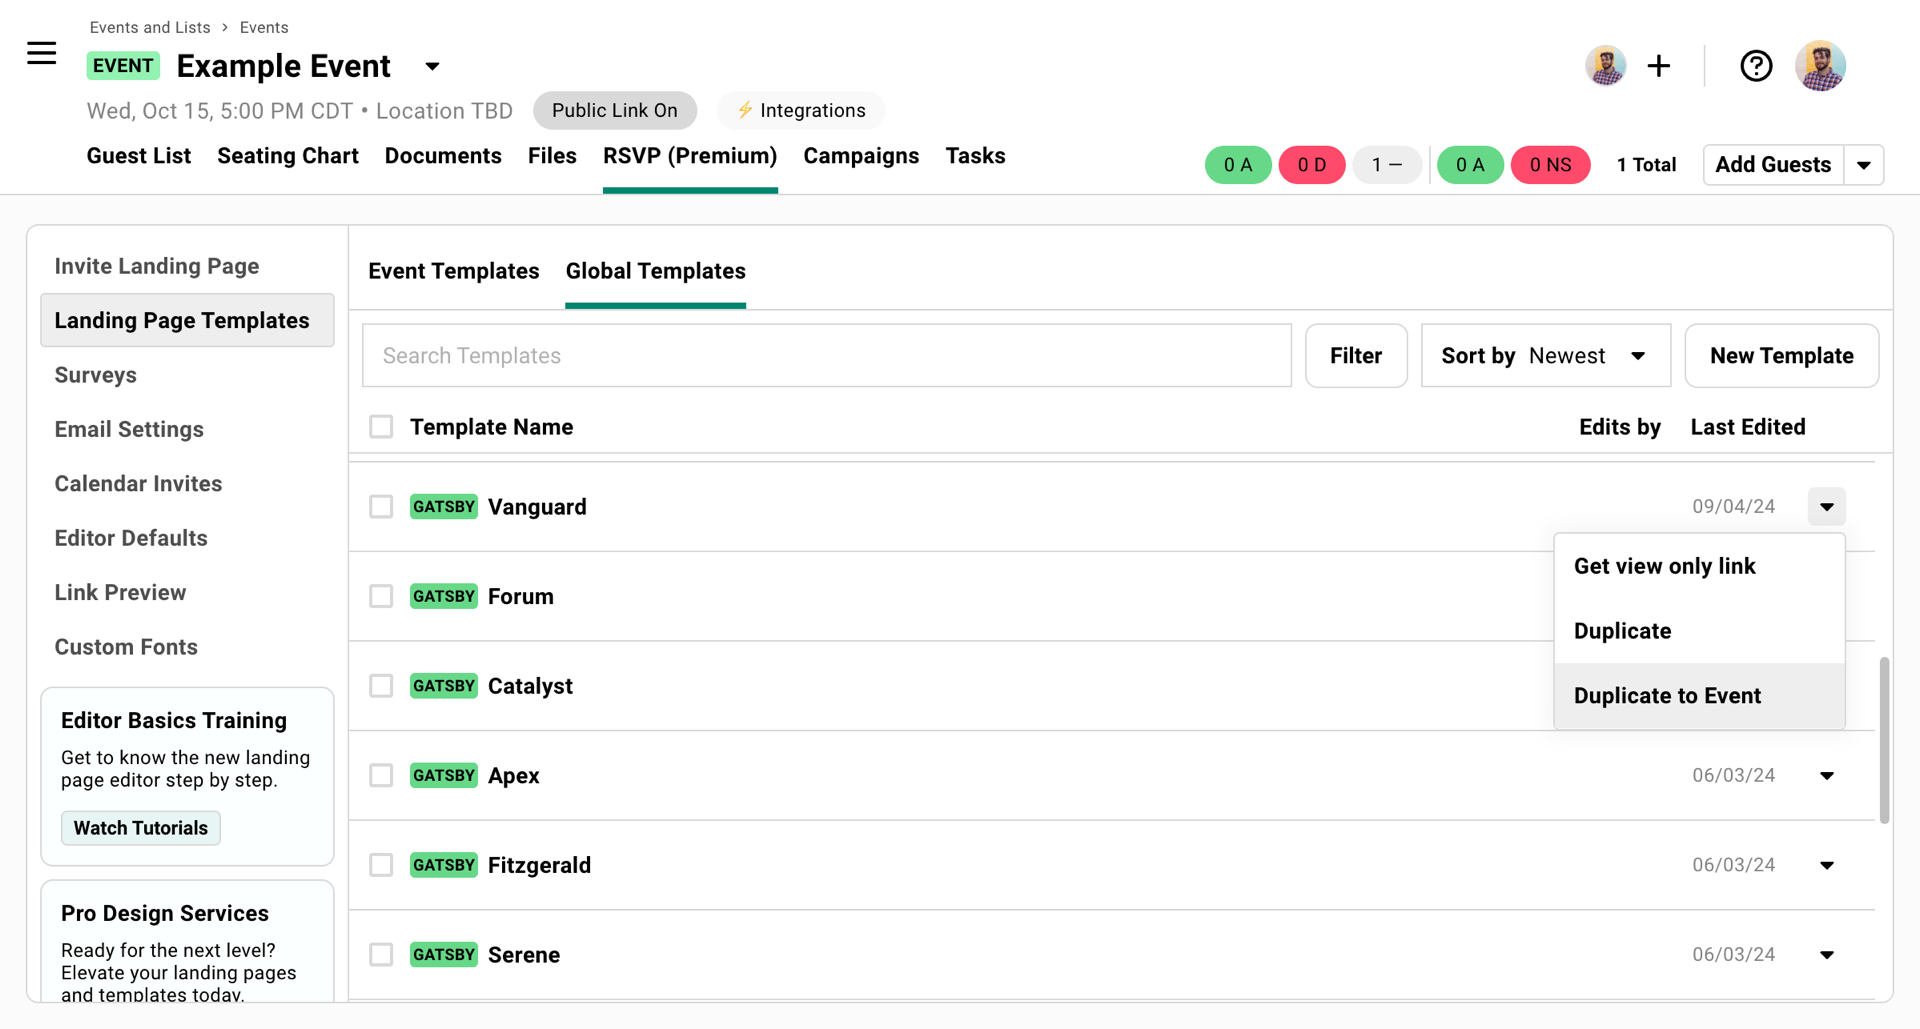 Start in the Global Templates section to find an event website you like.
 -
Customize Content
Replace placeholder text, upload your images, and adjust fonts and colors to match your brand.
-
Set as Active
When ready, select “Use as Landing Page” option to set your landing page as “In Use.”
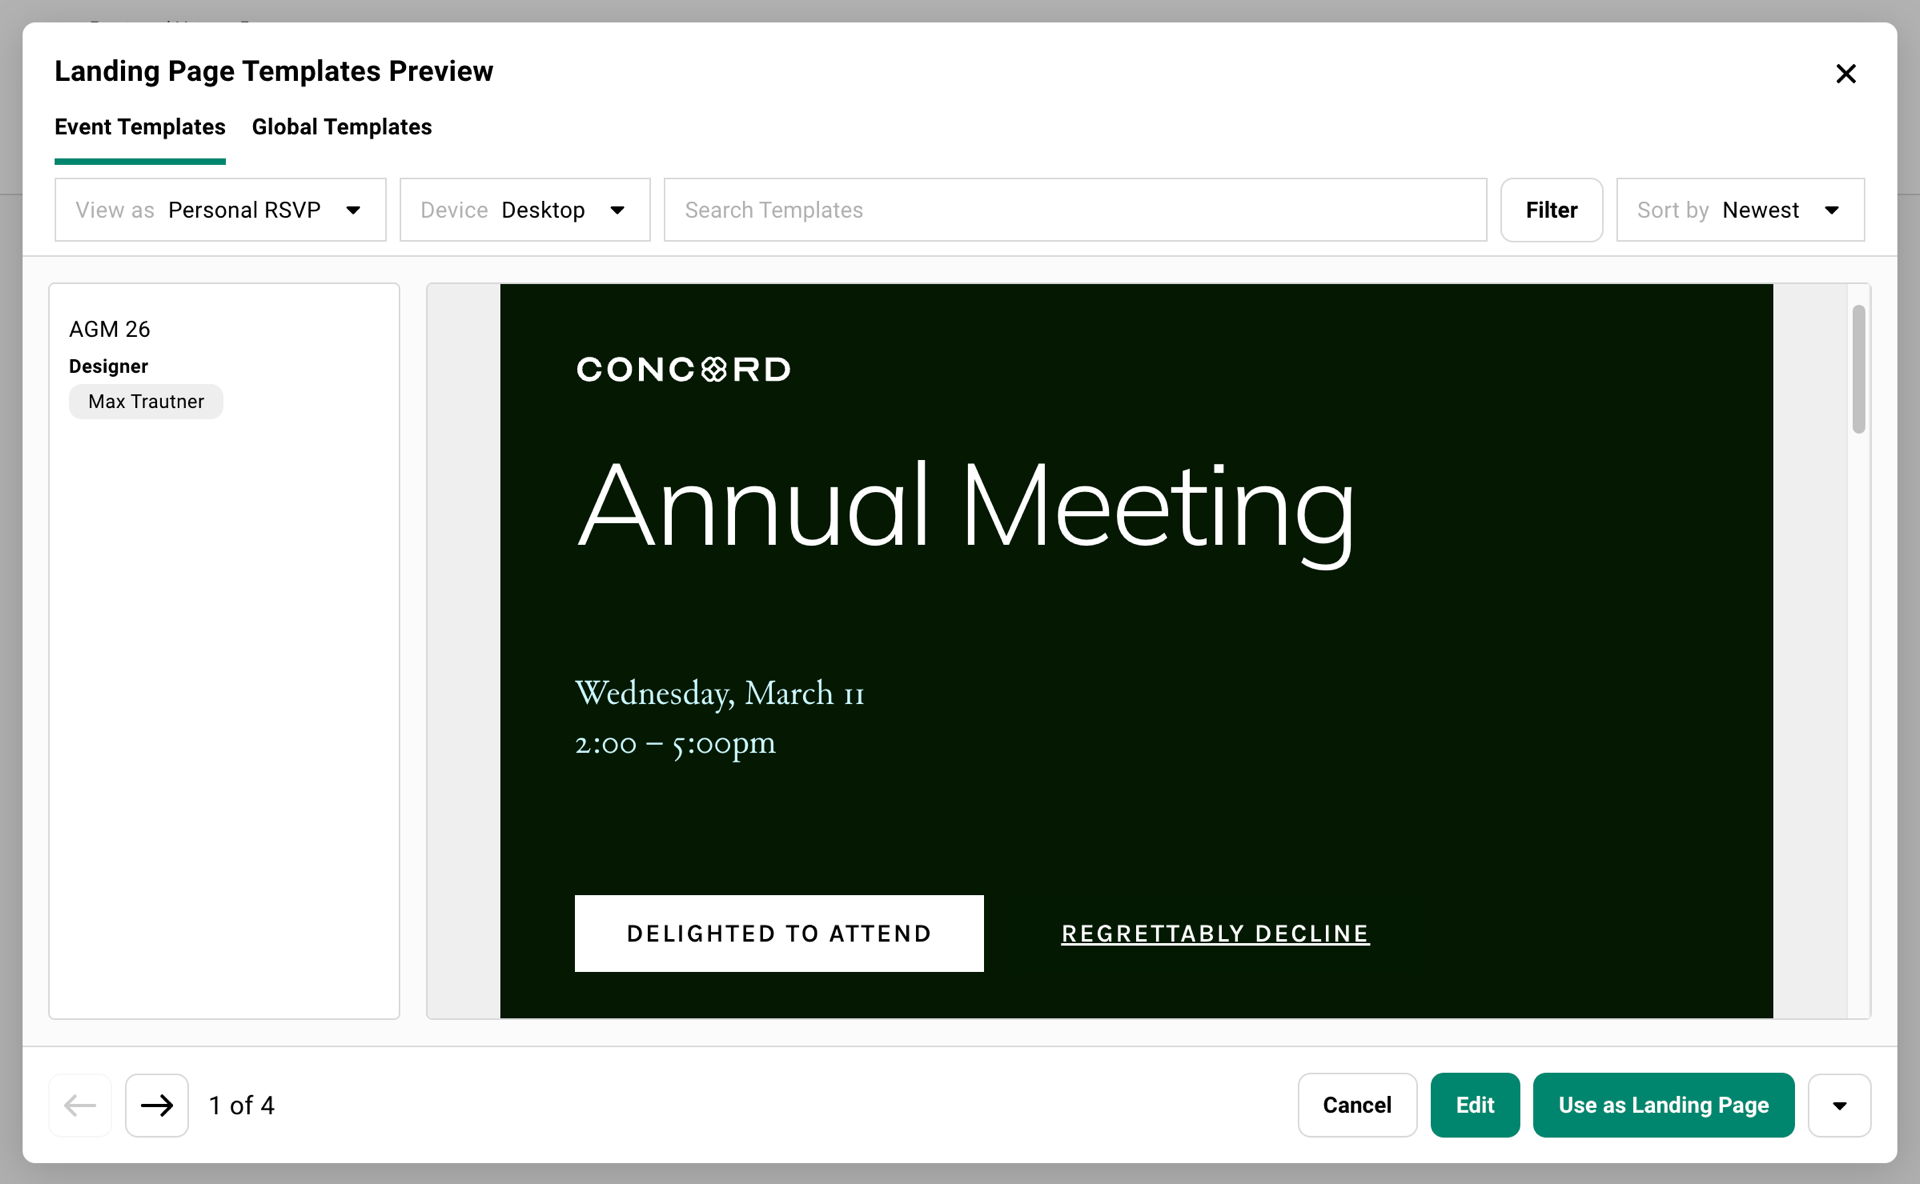 Click on a template to preview and select 'Use as Landing Page'
Modify Registration Form
Section titled “Modify Registration Form”Collect the information you need from guests during registration using the Surveys tool.
-
Access Surveys
Go to RSVP » Surveys to add questions to your registration form.
-
Choose Question Types
Use Predefined questions (dietary restrictions, company info) that automatically pull from and save to contact profiles, or create New custom questions.
 Add and modify survey questions.
Customize Confirmation Emails
Section titled “Customize Confirmation Emails”These automatic emails deliver calendar invites and serve as breadcrumbs for guests to return and update their registration.
-
Configure Email Settings
Go to RSVP » Email Settings to customize confirmation emails.
-
Choose Your Sender
Select who the confirmation appears to come from.
Only a SendGrid email sending account should be used for sending confirmation emails. Set up SendGrid.
-
Write Your Message
Include key details and instructions. Include the calendar invite as an attachment on this email. Provide an
{rsvpLink}for guests to revisit their registration. -
Test this Email
Add yourself to the guest list and complete the full registration process to see what guests experience. Mark yourself as RSVP » Accepted and send yourself the confirmation email to test it multiple times.
Part 4: Send an Invite
Section titled “Part 4: Send an Invite”Campaigns are the emails you send from Gatsby. They include your invitation content and a link to the RSVP landing page.
Create a Campaign Email
Section titled “Create a Campaign Email”-
Start a New Campaign
Go to Campaigns tab and click “New Campaign.” Choose “Draft” for maximum flexibility.
-
Add Campaign Details
- Name: Internal reference (guests don’t see this)
- Sender: Choose from your connected email accounts
- Subject: What guests see in their inbox
-
Write Your Invitation
Draft your message explaining the event and why they should attend.
-
Add Personalization
Click the + icon to insert:
{firstName}for personal greetings{rsvpLink}for their unique registration link
-
Include Event Information
Add date, location, and other details. You can also insert your event’s RSVP image.
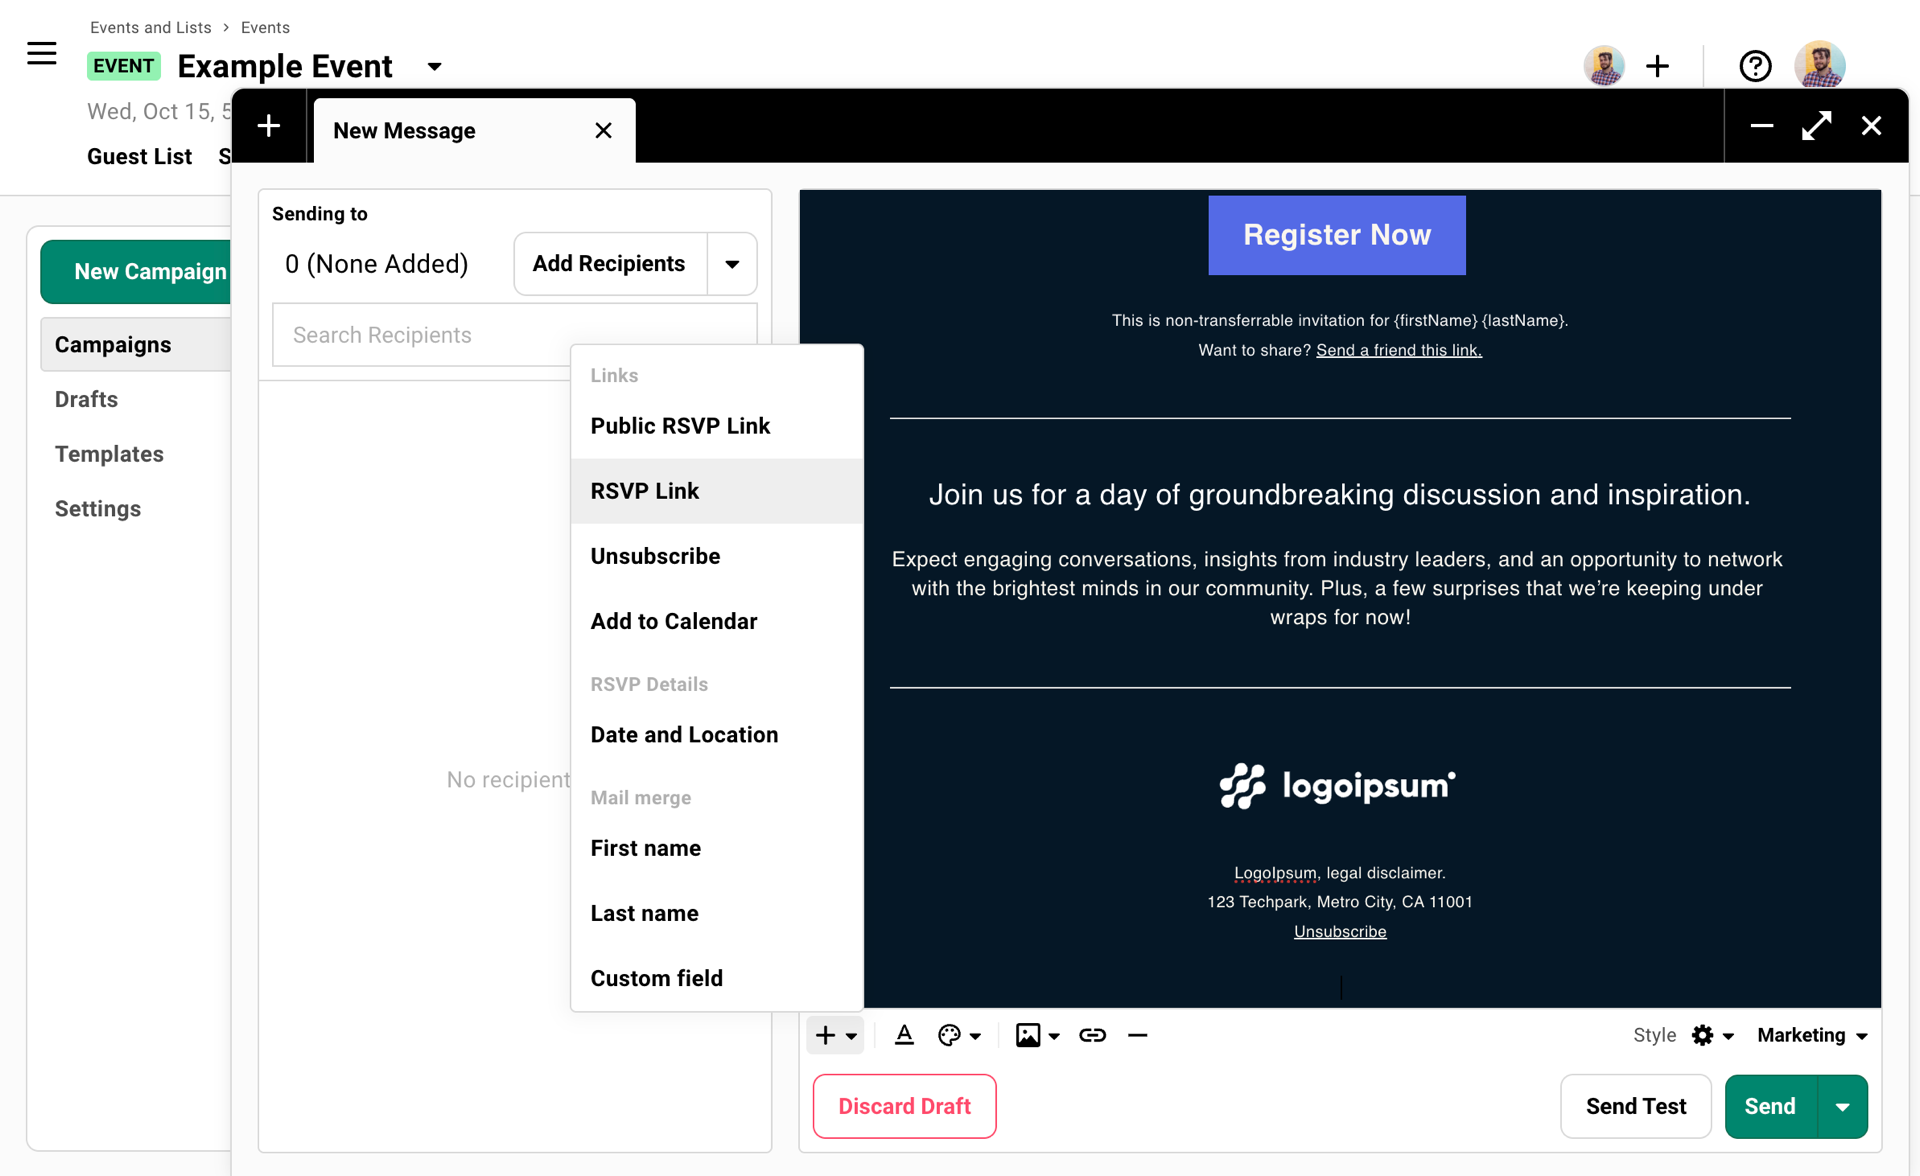 Use the mail merge tool to add your guest's link to RSVP.
The RSVP link is crucial.
This unique URL tracks each individual’s response and is non-transferrable. Always use the mail merge button to insert {rsvpLink}, don’t type it manually. Don’t paste a link to register for your event.
Test Before Sending
Section titled “Test Before Sending”Two types of testing:
Send Test (for design review):
- Quick check of formatting and links
- Links won’t work fully but you can see layout
- Good for catching typos and design issues
Full Test (recommended):
- Add yourself to the guest list
- Send the campaign to yourself
- Complete the entire registration process
- Verify confirmation emails and calendar invites work
Add Recipients and Send
Section titled “Add Recipients and Send”-
Add Recipients
Click “Add Recipients” and choose from your guest list segments (all guests, specific sections, RSVP status groups).
Use the guest list! Select guests » Send Message » Add to current draft.
-
Review Everything
Double-check sender, subject line, and content. Make sure you included the RSVP link.
-
Send or Schedule
Send immediately or schedule for optimal timing. You can always use “Not Sent To” later for any additions.
Part 5: Tracking
Section titled “Part 5: Tracking”Great! You’ve sent invites. You’ll send follow-ups, reminders, and more through the life-cycle of your event. Use the guest list to keep track of it all.
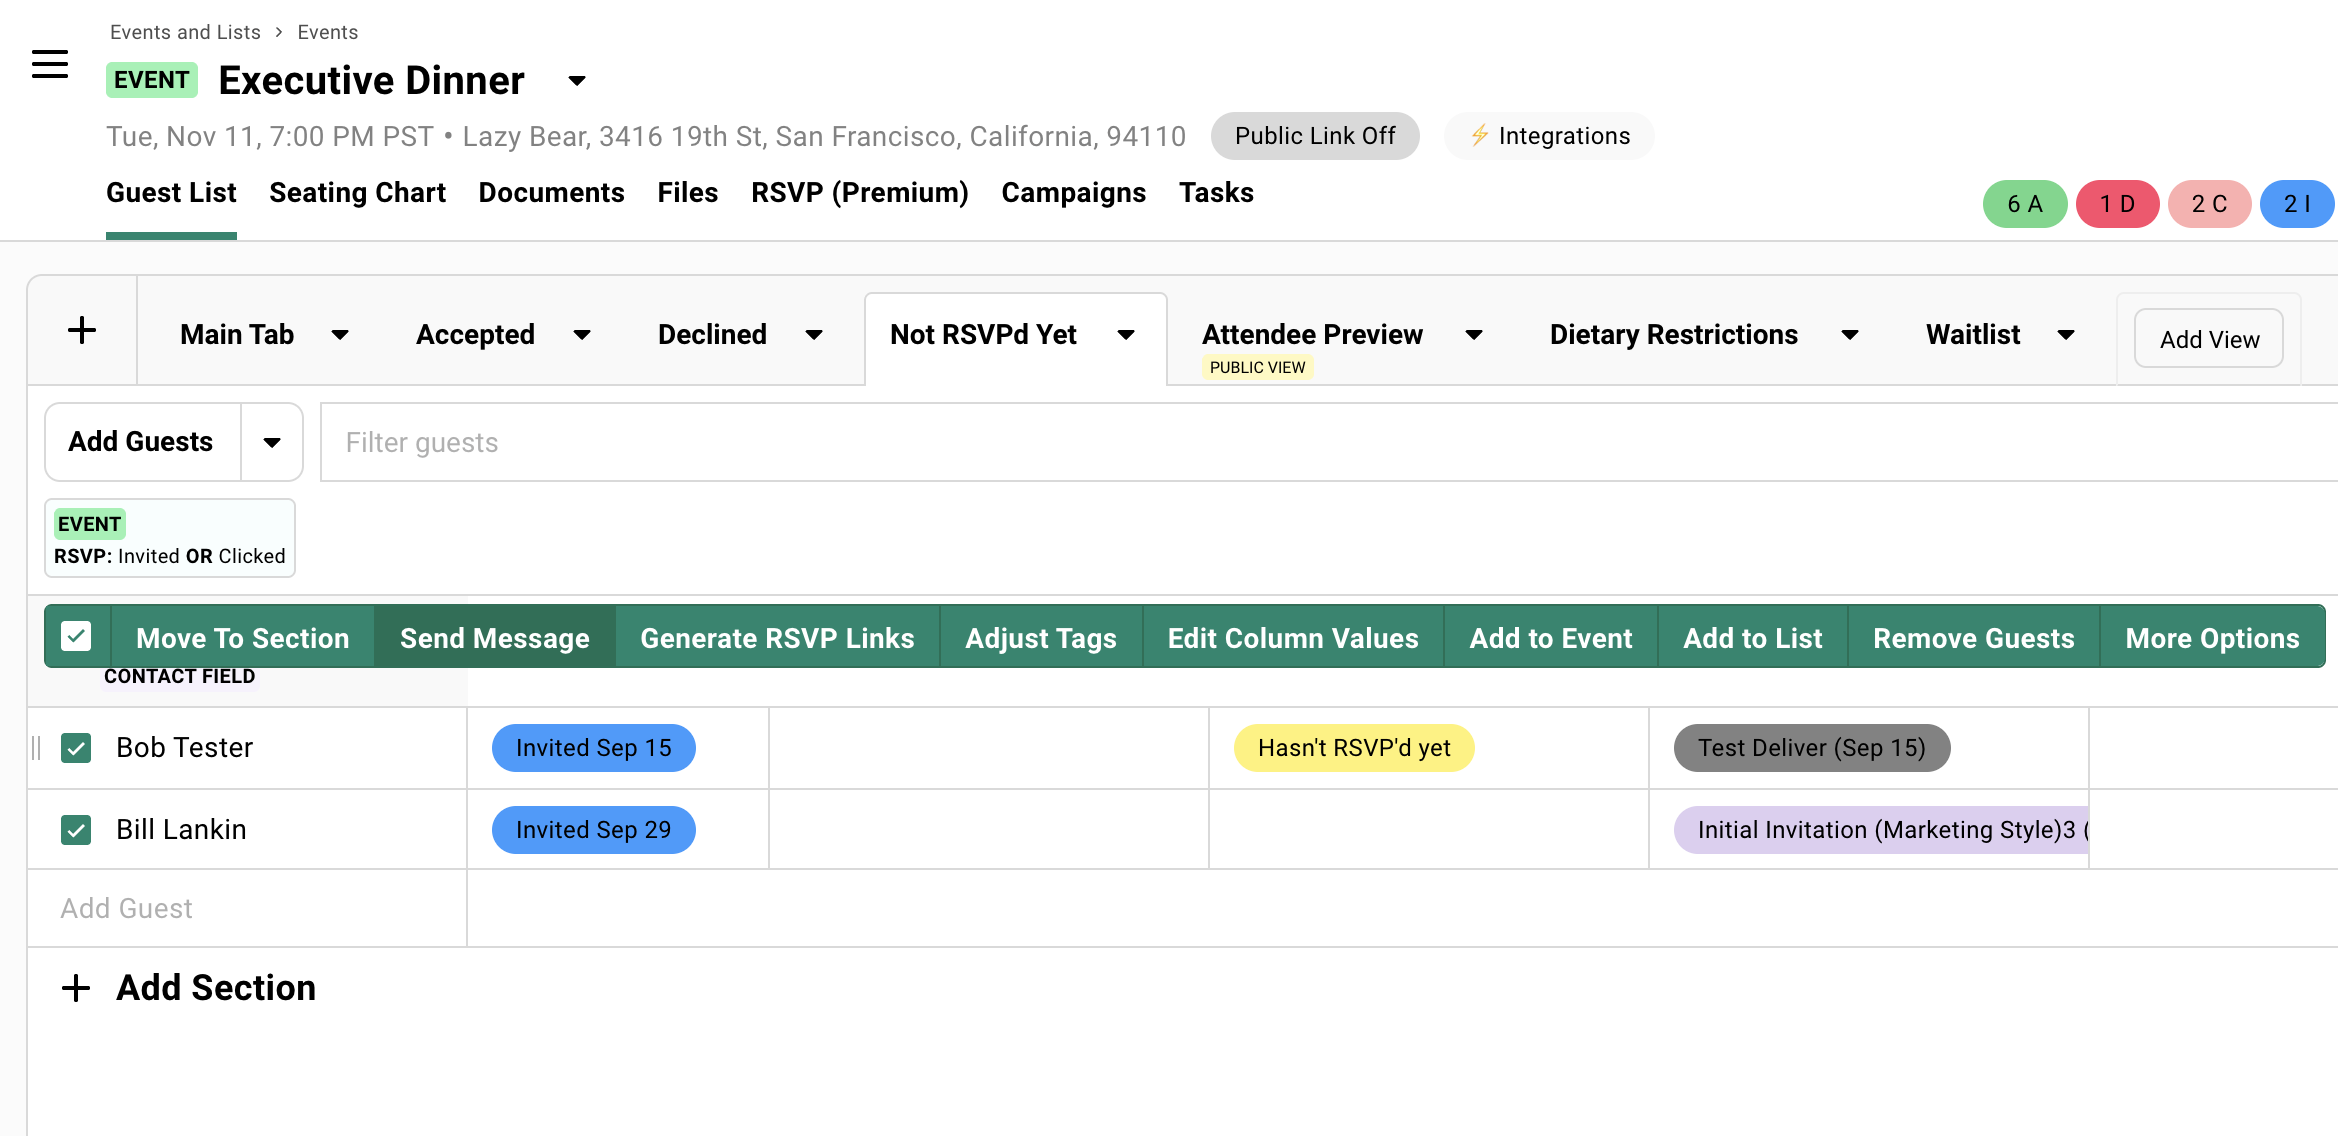
Monitor RSVP Activity
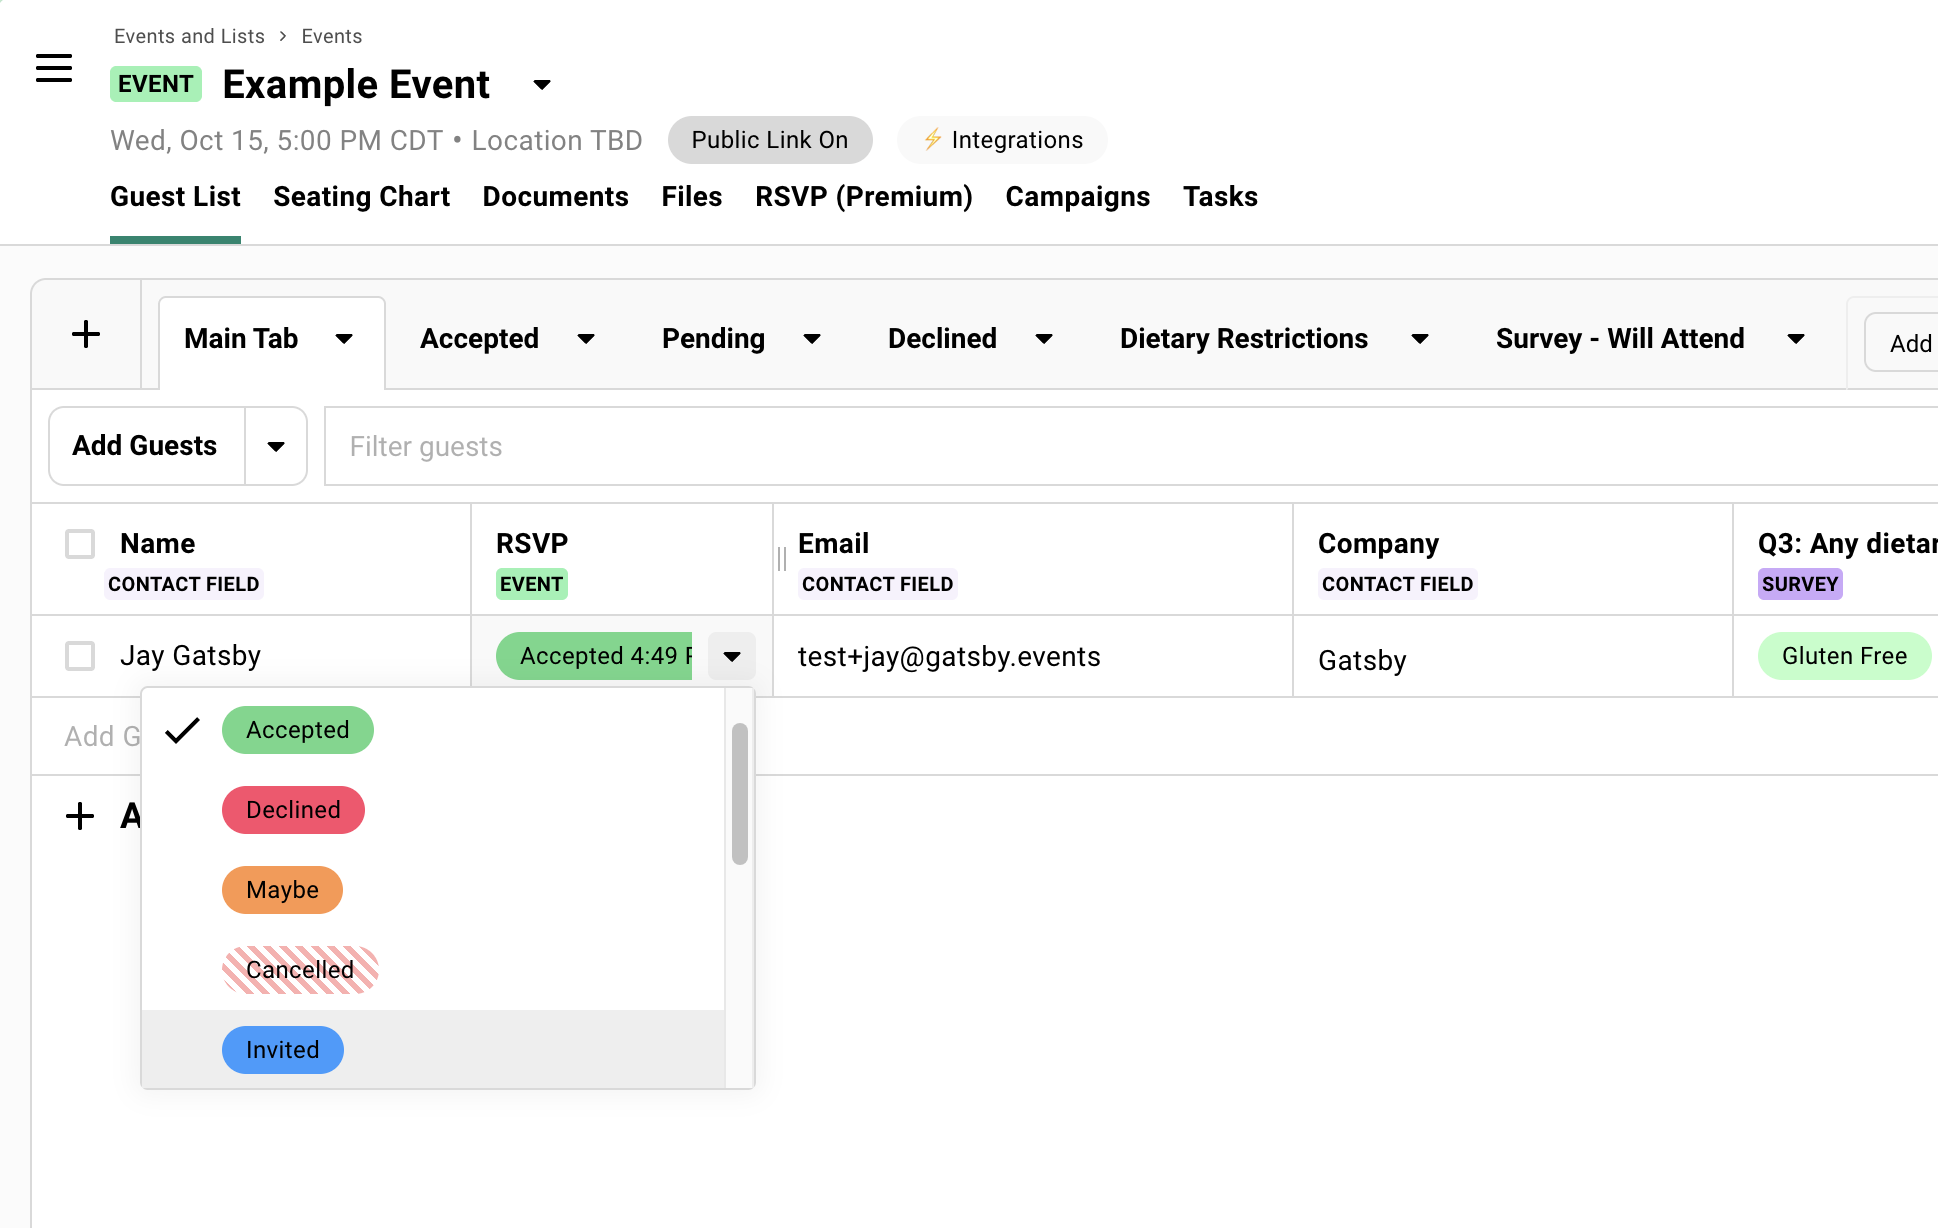
Section titled “Monitor RSVP Activity”Watch your guest list as responses come in:
- Invited: Sent RSVP link but no interaction yet
- Clicked: Visited landing page but didn’t complete registration
- Accepted/Declined: Completed registration
- Bounced: Email delivery failed
Learn more about RSVP status.
Follow Up with Non-Responders
Section titled “Follow Up with Non-Responders”-
Filter by Status
Use guest list filters to find people who have “Invited” and “Clicked” status but haven’t responded.
-
Send Targeted Follow-Up
Select these guests and create a reminder campaign that includes their RSVP link again.
Handle Changes
Section titled “Handle Changes” Event details changed?
Update your event information and Gatsby will prompt you to send calendar updates to accepted guests.
Need to add more guests?
Use the “Not Sent To” feature in your original campaign to send the same invite to new people without having to duplicate your campaign.
What’s Next
Section titled “What’s Next”You now have the foundation for running professional events in Gatsby. There’s more to explore with seating sharts, check-in and badge printing, multi-event registration, and more.
Remember: You can’t break anything by experimenting. Events are easy to duplicate, guests can be removed and re-added, and campaigns can be tested thoroughly before sending to your full list.
Common Questions
Section titled “Common Questions” Can I edit things after creating the event?
Yes, everything is editable. Event details, landing pages, guest lists, and email campaigns can all be updated at any time.
What if guests forward their invitation links?
Personal RSVP links only work for one person. Someone using another person’s link can’t add their own name and email address. The original guest gets notified of changes to their registration.
Should I use Public Links?
Start with personal invitation links for better control and tracking. Add Public Links later if you need open registration or social media promotion.
How do I handle plus-ones?
Enable plus-ones in your RSVP settings and set individual limits per guest using the Plus Ones Allowed column on your guest list.
Add to your calendar
Add to your calendar